OK, this sorta has me scratching my head a bit. Is a multipart 3D model a kit?
The reason this is confusing me a little is that there seems to be a pretty distinct demarcation line in the modelling world between a 'kit' and a 3D printed model. But let me explain my quandry...
Busted!
It had to happen. So far my 3D printing adventures have been pretty much disaster free, that was until I took on something a little more complex and a little larger than my normal print models. As a history fan I was very taken by some of the classical statues and busts that are available over on the THINGYVERSE 3D model repository so I - nervously - attempted a scaled down test of Emperor Claudius...

As you can see from the above photo of the finished print, everything when surprisingly well and I was very pleased with the quality of the result. So much so, in fact, that I was very keen to try another (though these are very long prints - around 9 hours or more for a 10cm high bust) and I decided I would do a series of classical busts.
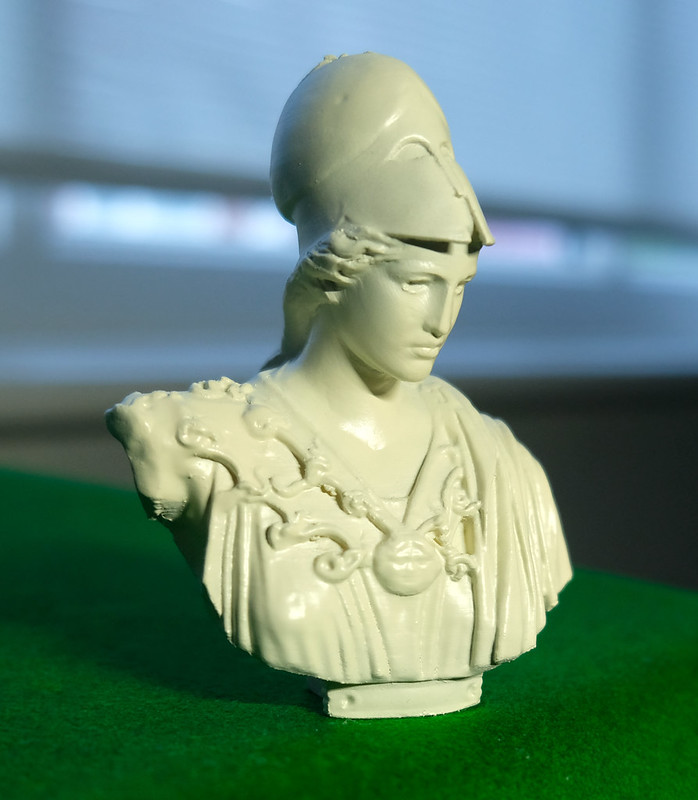
My next attempt was a miniature version of the famous Athena of Velletri (a copy of which is in the Louve) and I set the print settings up exactly as I did with my Claudius hoping that I would get the same excellent print results...Oh dear...

Much to my horror after 11 HOURS of printing - where everything seemed to be going just fine - I noticed that something wasn't quite right. And sure enough, when the print ended and I removed the network of supports that encased the print there was a prominent defect across the shoulders, neck and chin of the bust.
So, How Do I Recover from a Print Disaster?
As is obvious, I am new to the world of 3D printing, were I not new I might have the experience to have avoided such a frustrating failure. But, trawling some of the 3D printing forums I notice that I am not the only one who has these 'oopsies', it seems to be a common pitfall for all new printers.
However, here's where my background in plastic scale model making perhaps makes the difference...
I note that for many 3D print novices there seems to be this notion that the goal is to produce the 'perfect print' and - yes - that is a nice idea but when there are so many things that can go wrong having a strategy for when things go wrong seems only sensible. Too often I have seen examples where novice printers simply try, try and try again - always in search of that illusive golden print!
That was not my instinct, for me the kit makers philosophy of 'how can I save this model' kicked in. As much as anything else I just couldn't bear the idea of abandoning 11 hours 'work' and the 7 meters of PLA filament that had been used to make a model that was 75-80% perfect... What could I do to rectify the 15-20%.
Repairing a 3D Print
As I said, it seems to me (though this probably isn't completely true) that many 3D newbies are after perfection and some maybe don't have the modelling skills required to make pleasing repairs. It seemed quite natural to me - a modeller - to want to 'make good' the bad bits in my print. So, my first idea was to simply cut out some of the duff parts and replace them with nicely printed pieces...

Luckily doing this is made pretty easy using the 'slicer' software (Flashforge Flashprint) - this is a program that prepares 3D models by dissecting the model and translating it so that a 3D printer can make up the model from extruding (squirting out) layers of molten PLA filament! 😁

As it turned out, it was a little more complex than that (isn't it always with me). And, just to make things a little more interesting I decided to experiment with cutting up parts even further to see if I could get the best quality prints that I could...

To be honest, it just meant that I had to sit down and do some serious planning about how all the parts would come together... Like a kit!
I find it interesting that there seems to be some sort of perceived division between traditional kits and the new craft of 3D printing. There is a area of cross-over. In fact, looking into it further I discovered that people like me who have a small 3D printer often use the work-around of cutting up large prints into smaller components and then reassembling the output into a large model that they otherwise could not print. In other words, they make kits.
Parts made I then had to stick them together - using superglue, although I was not quite sure what was the best thing to use for PLA - and there were a few little gaps here and there that needed to be filled and smoothed away using fine white Milliput putty...

Originally my idea was to have the bust model I am doing as they came off the printer in plain white PLA. My Claudius figurine looked great, but with the obvious repairs in my Athens (as it turns out there is 'white' and then there's 'white) I rethought this idea. Actually, the starkness of the white PLA was a little to intense - even my wife and daughter commented that it was 'too much'. And so, I decided to give the model a coat of paint.
To help disguise and cracks I first primed Athena with some of the new filler/primer spray I have bought - this settles into any small lines - and then I use an off-white colour to give the bust a marble look. I was very pleased with the final outcome (especially as the Rust-Oleum Painter's Touch 'Ivory Beige' spray turned out to be a satin paint)...
No comments:
Post a Comment