...All I have to do is another two now!
Diary of a novice scale model maker and his adventures in the wacky world of Braille Scale.
Showing posts with label X-Ref: CON/ResV3000/0314. Show all posts
Monday, 7 April 2014
Friday, 4 April 2014
Quick Ford V3000S (G198TS) - Part 6
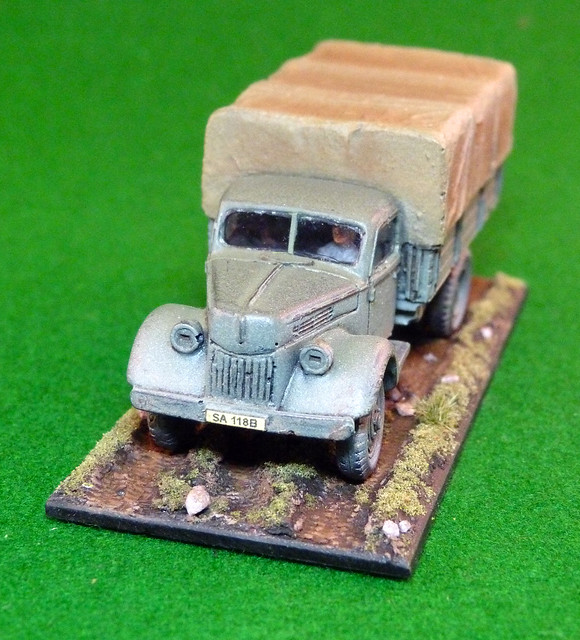
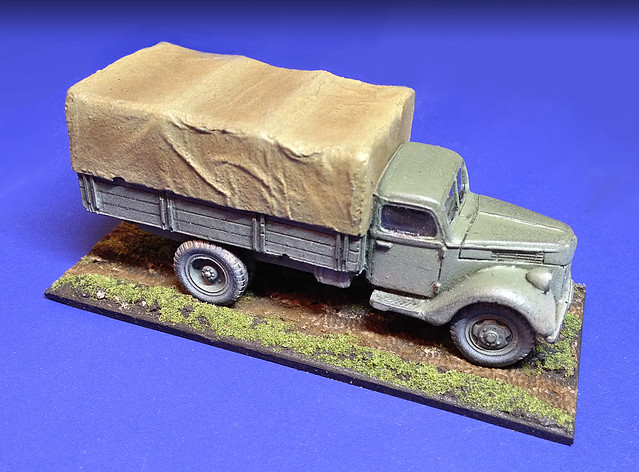
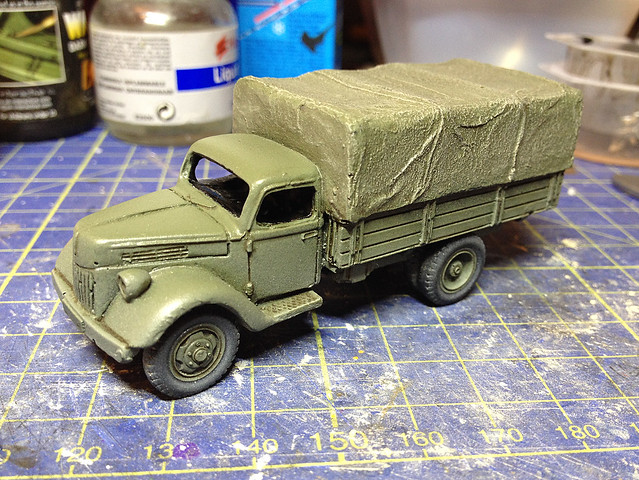
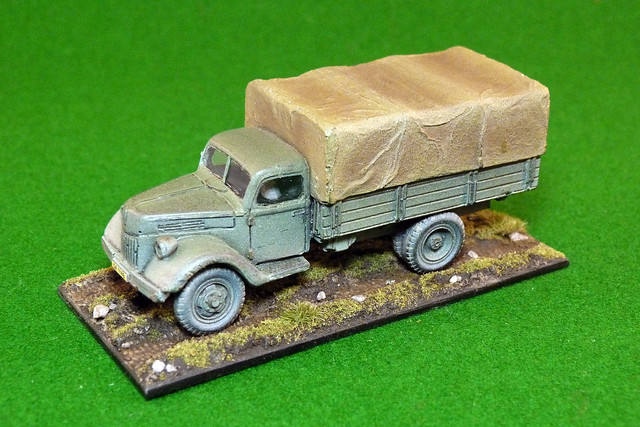
Oh, so close to finishing...It's annoying I have to work, I cold have done this whole model in a couple of days straight I reckon instead of small bits at a time over the course of a week. Still, I managed to find some time last night to get the canvas tilt weathered and the base painted...
I used a mixture of chalky mediums for the canvas. The base coat was a sandy colour, I then applied a shadow colour to this using some Humbrol weathering powders (medium brown) and then the highlights were done with artist's conté crayons. I then blended the highlights into the mid and shadow colours so there was a subtle gradient of shades, smudging streaks of highlight across folds in the canvas.
Powders and chalks can look a little gritty in texture, which although nice for a texture like canvas can be a bit too much. BUT I was glad to see that when I sprayed the canvas with some matt varnish - too fix the powders - the grittiness disappeared and the whole effect was smoothed out.
The base is OK-ish, but I need a lot more practise making realistic earthy textures. I think I will add some small stones for variation and maybe some longer grass. I really like the work of Piers Brand and I am kinda following his wonderful examples for inspiration...
Well, that's about it really. I just have to fix the truck to it's base and properly photograph the final result (the above snap was taken with my trusty iPhone). I've enjoyed this project and have worked out a few ways I can do it easier and better when I do the remaining two V3000s for my Finnish Jaegar company.
...My mind now turns to my next victim! :)
I used a mixture of chalky mediums for the canvas. The base coat was a sandy colour, I then applied a shadow colour to this using some Humbrol weathering powders (medium brown) and then the highlights were done with artist's conté crayons. I then blended the highlights into the mid and shadow colours so there was a subtle gradient of shades, smudging streaks of highlight across folds in the canvas.
Powders and chalks can look a little gritty in texture, which although nice for a texture like canvas can be a bit too much. BUT I was glad to see that when I sprayed the canvas with some matt varnish - too fix the powders - the grittiness disappeared and the whole effect was smoothed out.
The base is OK-ish, but I need a lot more practise making realistic earthy textures. I think I will add some small stones for variation and maybe some longer grass. I really like the work of Piers Brand and I am kinda following his wonderful examples for inspiration...
![]() |
| A lovely example of Piers Brand's work, I like the way - among other things - he does his bases. You can see more on his blog: World War 20mm |
Well, that's about it really. I just have to fix the truck to it's base and properly photograph the final result (the above snap was taken with my trusty iPhone). I've enjoyed this project and have worked out a few ways I can do it easier and better when I do the remaining two V3000s for my Finnish Jaegar company.
...My mind now turns to my next victim! :)
Tuesday, 1 April 2014
Quick Ford V3000S (G198TS) - Part 5
I wasn't going to post this as I thought this was only a small job. But when I thought about it this bit of the project is actually a critical part of the whole concept behind this model.
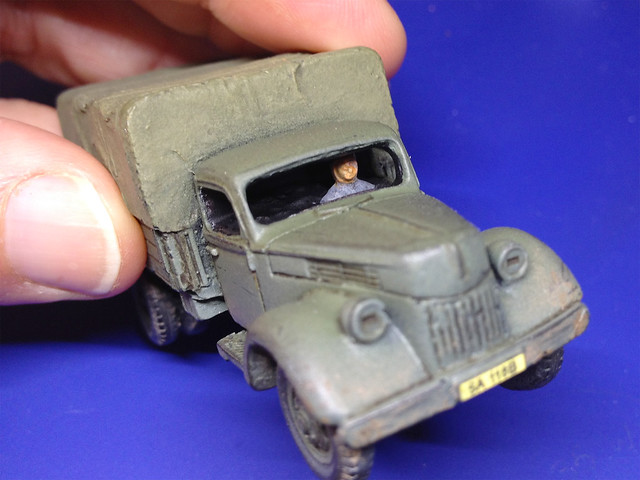
At it's heart this model differs from a simple solid one-piece ready to roll resin model because it is no longer solid or one-piece and because it now has a cab-interior - of sorts - and a windscreen! And it's the transparent windscreen that is the feature which helps bridge the gap between a wargame quality model and my other plastic multipart kits.
I created paper templates first and then cut each windscreen to fit individually, carefully sanding them to fit. Then I glued the transparent plastic in using Formula '560' glue - which I think dries clearer than normal PVA (it's marketed as 'the world's best canopy glue').
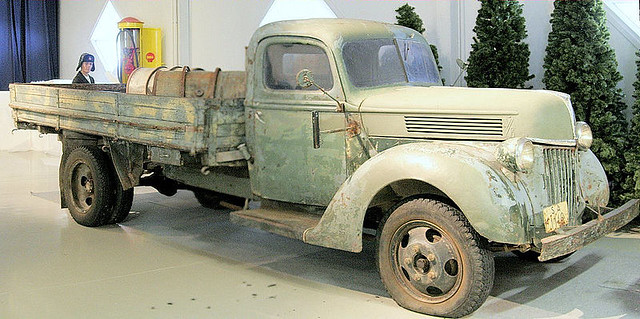
The Fordwerkes V3000 (G198TS) - built at Cologne and Berlin during the war - seem to have been built with a single/one-piece main windscreen, but the Finn's V3000s seem to have been American made versions which had a split windscreen [I believe that the V3000s built in Holland prior to the war had the split screen as well, so when you see a Wehrmacht V3000 with a split screen these are likely captured Dutch trucks].
The upshot of this is that - once the glue has dried - I will add a small plastic rod down the middle of the windscreen to 'make it Finnish'! I am also considering adding tiny windscreen wipers - just for the hell of it! :)
Next: Nearly there! Just the base and the re-weathering of the canvas tilt to do.
At it's heart this model differs from a simple solid one-piece ready to roll resin model because it is no longer solid or one-piece and because it now has a cab-interior - of sorts - and a windscreen! And it's the transparent windscreen that is the feature which helps bridge the gap between a wargame quality model and my other plastic multipart kits.
![]() |
| I know...You can't really see the windscreens. Honest, they are there! Oh, the masking tape is so I don't get greasy fingerprints on my paintwork. |
The Fordwerkes V3000 (G198TS) - built at Cologne and Berlin during the war - seem to have been built with a single/one-piece main windscreen, but the Finn's V3000s seem to have been American made versions which had a split windscreen [I believe that the V3000s built in Holland prior to the war had the split screen as well, so when you see a Wehrmacht V3000 with a split screen these are likely captured Dutch trucks].
![]() |
| A real Finnish V3000. |
Next: Nearly there! Just the base and the re-weathering of the canvas tilt to do.
Sunday, 30 March 2014
Quick Ford V3000S (G198TS) - Part 4(b)
Last post of the weekend! And this gets me back on course after a bit of a disappointing couple of days of modelling...
As mentioned in my previous post about this project I was not happy. Things hadn't gone right with this model right from the start, a lot of the problems came about because this is the very first model I have done where I have relied a lot more on my Revell airbrush...No rattle cans used this time! (Except for the black primer.)
I just couldn't get the paint consistency right. Colours weren't right, coverage wasn't right and piling on further layers just didn't make me any happier. As said, a bit of this was due to lack of planning, but I was also frustrated by using new equipment and techniques that I needed more practise with.
Chief problem was the paint mixture. I didn't get this right and I guess I was spraying with overly thinned mixture, therefore everything was too pale.
Well, I finally twigged what the problem was and went out today and bought a couple of bottles of Vallejo's Model Air colours. The results were terrific as these are pre-mixed paints, designed to be used in your airbrush straight out the bottle...
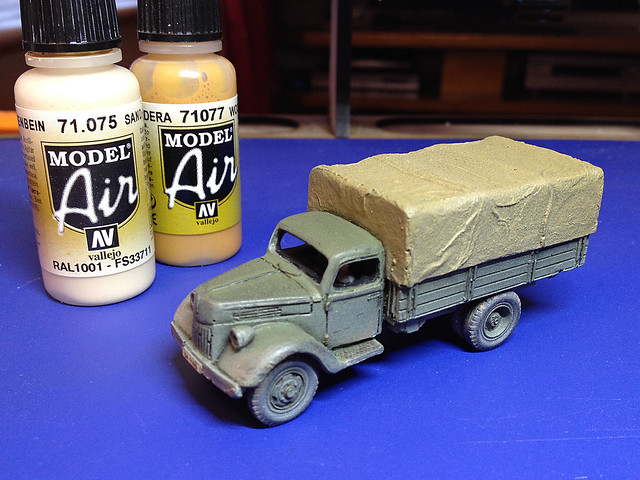
I could now see the colour build up smoothly as I passed my airbrush over the model. This is a lot better and I also took the opportunity to adjust the colour of the tilt canvas that I wasn't happy with as well!
I'm sold on the Model Air paints as they take the guess work out of airbrushing for a novice like myself. I was able to add a fairly subtle (for me) film of dust, modulate the colour of the tilt and improve and even out the muck on my tyres.
So, it's now Sunday night and I certainly haven't made as much progress with this or my 1939 Chevy model as I had wanted to this weekend. But the discovery of these wonderful paints made up for my poor modelling efforts as I am now more confident about using my airbrush and can begin to experiment with some subtle shading effects.
Finally, A big thanks goes to my local general store - Boyes of Scarborough - which was open on Sunday and stocks the full range of Vallejo paints in it's hobby section.
As mentioned in my previous post about this project I was not happy. Things hadn't gone right with this model right from the start, a lot of the problems came about because this is the very first model I have done where I have relied a lot more on my Revell airbrush...No rattle cans used this time! (Except for the black primer.)
I just couldn't get the paint consistency right. Colours weren't right, coverage wasn't right and piling on further layers just didn't make me any happier. As said, a bit of this was due to lack of planning, but I was also frustrated by using new equipment and techniques that I needed more practise with.
Chief problem was the paint mixture. I didn't get this right and I guess I was spraying with overly thinned mixture, therefore everything was too pale.
Well, I finally twigged what the problem was and went out today and bought a couple of bottles of Vallejo's Model Air colours. The results were terrific as these are pre-mixed paints, designed to be used in your airbrush straight out the bottle...
![]() |
| I now have to re-shade and re-weather the tilt now it's the right colour. |
I'm sold on the Model Air paints as they take the guess work out of airbrushing for a novice like myself. I was able to add a fairly subtle (for me) film of dust, modulate the colour of the tilt and improve and even out the muck on my tyres.
So, it's now Sunday night and I certainly haven't made as much progress with this or my 1939 Chevy model as I had wanted to this weekend. But the discovery of these wonderful paints made up for my poor modelling efforts as I am now more confident about using my airbrush and can begin to experiment with some subtle shading effects.
Finally, A big thanks goes to my local general store - Boyes of Scarborough - which was open on Sunday and stocks the full range of Vallejo paints in it's hobby section.
Quick Ford V3000S (G198TS) - Part 4
...Not happy...
A quick project shouldn't mean a badly planned out project. That's what I've learned. Unfortunately I fell into that trap and just launched into my 'quick v3000' without thinking it through before I started and I've made several boo-boos as a result.
The above picture shows my V3000 midway through it's paint job, the biggest disappointment is the tilt canvas which I really should have base-coated with a canvas (buff) colour right at the start. This is after my second wave of weathering touches but my lack of a clear plan has me adding effects quite haphazardly.
I am trying to be more focused now and have slowed down a bit, but the next important stage - tiny as it is - is to insert a little driver! Now, remember that my cab is a cheat and only half excavated so I had to just use a spare figure cut in two and I will be using just the top half of that, from the chest upwards...
It wasn't a very good figure model, and my painting is a bit slap dash but I am hoping to hide some of these failings once I insert the transparent plastic windshields. All I wanted was to give the impression that there is a driver in the cab, as a wargame model I am banking on nobody looking that closely!
So, the next stage is the tricky one, cutting out the windows - so I will start with a few paper templates first to get the right size and shape. I'll also be making a quick base, but as I have done a post about how I make these already I shan't go into that again.
Next: (Hopefully...) The final touches and completion.
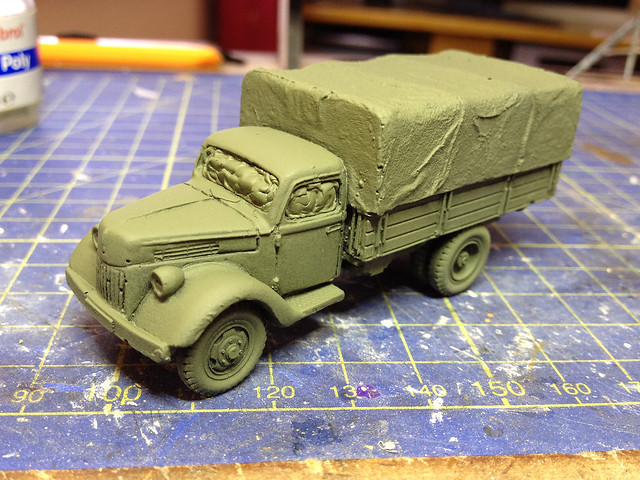
A quick project shouldn't mean a badly planned out project. That's what I've learned. Unfortunately I fell into that trap and just launched into my 'quick v3000' without thinking it through before I started and I've made several boo-boos as a result.
The above picture shows my V3000 midway through it's paint job, the biggest disappointment is the tilt canvas which I really should have base-coated with a canvas (buff) colour right at the start. This is after my second wave of weathering touches but my lack of a clear plan has me adding effects quite haphazardly.
I am trying to be more focused now and have slowed down a bit, but the next important stage - tiny as it is - is to insert a little driver! Now, remember that my cab is a cheat and only half excavated so I had to just use a spare figure cut in two and I will be using just the top half of that, from the chest upwards...
It wasn't a very good figure model, and my painting is a bit slap dash but I am hoping to hide some of these failings once I insert the transparent plastic windshields. All I wanted was to give the impression that there is a driver in the cab, as a wargame model I am banking on nobody looking that closely!
So, the next stage is the tricky one, cutting out the windows - so I will start with a few paper templates first to get the right size and shape. I'll also be making a quick base, but as I have done a post about how I make these already I shan't go into that again.
Next: (Hopefully...) The final touches and completion.
Friday, 28 March 2014
Quick Ford V3000S (G198TS) - Part 3
Right...Moving quickly on again..!
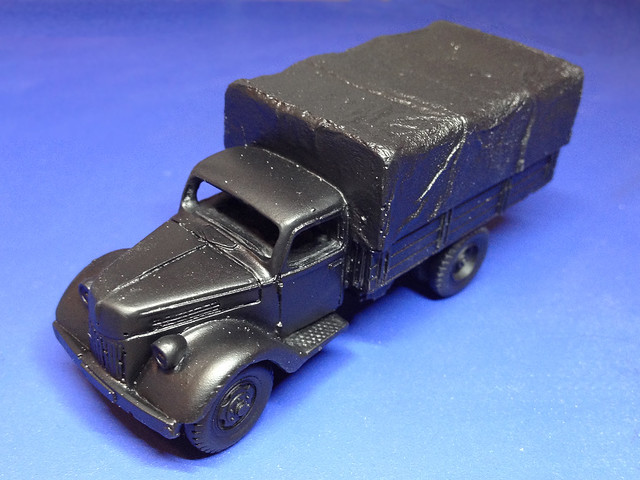
I decided to start with a black base coat to see if I could get some variation in tones if I airbrushed on the light olive I am using for my Finnish vehicles...
However, before I applied the olive green I wanted to mask out the cab interior which I want to stay black...
I managed to get some black undercoat faintly showing through which I was quite pleased about. Particularly in the crevices and panel line detail (I also didn't bother spraying the underside olive).
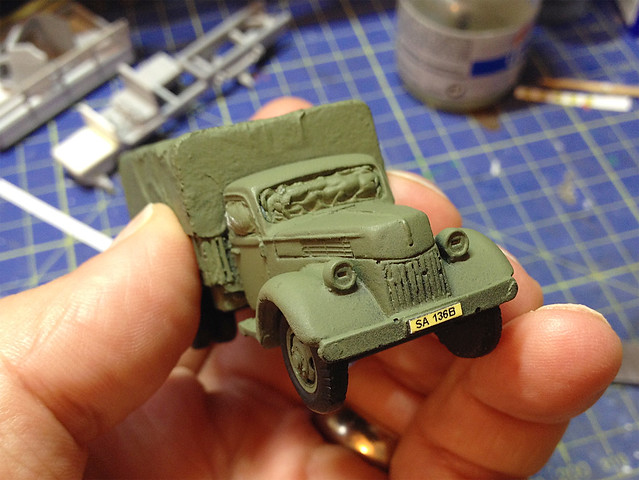
There isn't any military organisational or unit markings on Finnish transport (I'm not sure why that is), but I thought I would have a go at popping on a number plate (albeit a made up one)...
The general format of the plate is - I believe - authentic enough and the number starts with the obligatory Finnish military 'SA' nomenclature and the plate is yellow, it's just that I made the number up. I figured that as a wargame model I didn't have to be 100% authentic as the model is a representation of a type of vehicle rather than a specific individual truck.
Anyhoo, on to the initial weathering...More of shading really, with dustings of...Er...Dust! And then I started working into the tilt canvas. I was a bit disappointed in that really, I wish I had started with a different base colour rather than the canvas being the same colour as the rest of the truck. A khaki might have been better...
There's a bit of pin-washing in there using AK Interactive's Dark Brown Wash for Green Vehicles. I also removed the cab mask as the next stage will be to start working on the driver and the windshields. Then I will start working on some additional heavy weathering, chipping and damage...
Onwards!
[Thought I'd just add that this quick project is an experiment - as, I suppose, most of my projects are at the moment - and that if this works out I have another two of these Valiant resin trucks waiting on the workbench. These will complete my Jaeger's company transport under the Rapid Fire! rules that I'm using to guide my collection.]
I decided to start with a black base coat to see if I could get some variation in tones if I airbrushed on the light olive I am using for my Finnish vehicles...
However, before I applied the olive green I wanted to mask out the cab interior which I want to stay black...
I managed to get some black undercoat faintly showing through which I was quite pleased about. Particularly in the crevices and panel line detail (I also didn't bother spraying the underside olive).
There isn't any military organisational or unit markings on Finnish transport (I'm not sure why that is), but I thought I would have a go at popping on a number plate (albeit a made up one)...
The general format of the plate is - I believe - authentic enough and the number starts with the obligatory Finnish military 'SA' nomenclature and the plate is yellow, it's just that I made the number up. I figured that as a wargame model I didn't have to be 100% authentic as the model is a representation of a type of vehicle rather than a specific individual truck.
Anyhoo, on to the initial weathering...More of shading really, with dustings of...Er...Dust! And then I started working into the tilt canvas. I was a bit disappointed in that really, I wish I had started with a different base colour rather than the canvas being the same colour as the rest of the truck. A khaki might have been better...
There's a bit of pin-washing in there using AK Interactive's Dark Brown Wash for Green Vehicles. I also removed the cab mask as the next stage will be to start working on the driver and the windshields. Then I will start working on some additional heavy weathering, chipping and damage...
Onwards!
[Thought I'd just add that this quick project is an experiment - as, I suppose, most of my projects are at the moment - and that if this works out I have another two of these Valiant resin trucks waiting on the workbench. These will complete my Jaeger's company transport under the Rapid Fire! rules that I'm using to guide my collection.]
Monday, 17 March 2014
Quick Ford V3000S (G198TS) - Part 2
Moving quickly on...
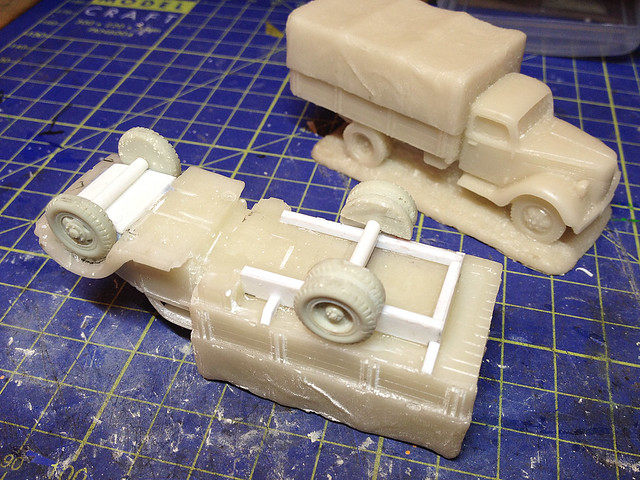
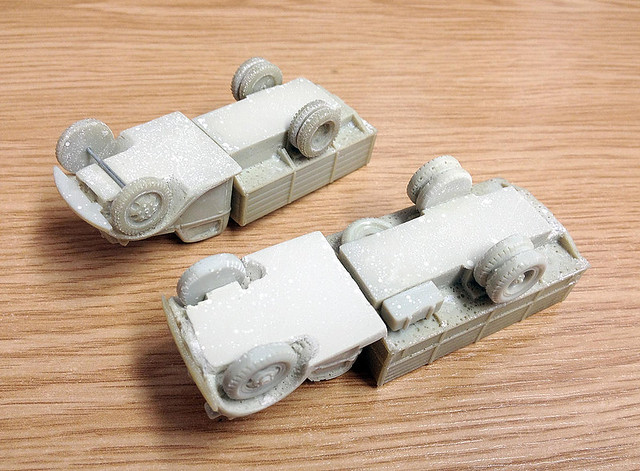
I made a very rudimentary chassis for my Valiant V3000. Just some plasticard bits and pieces, but enough to add some simplified detail to support the new wheels.
The model is now 'free standing' and I can mount it on one of my own bases to match the rest of my models from my Finnish collection. Having done this I need to finish tidying up the truck's excavated cab...
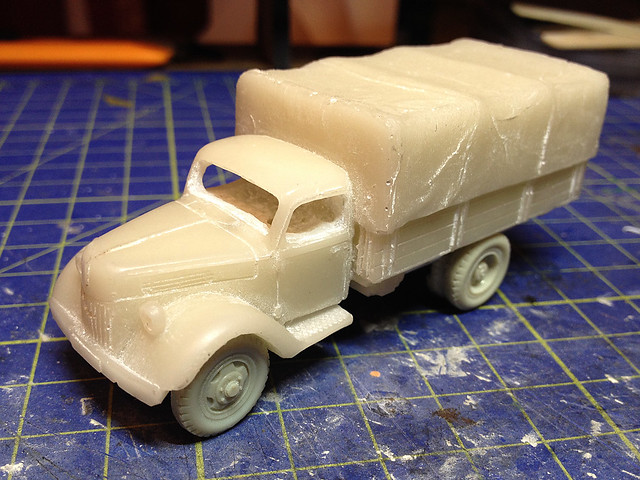
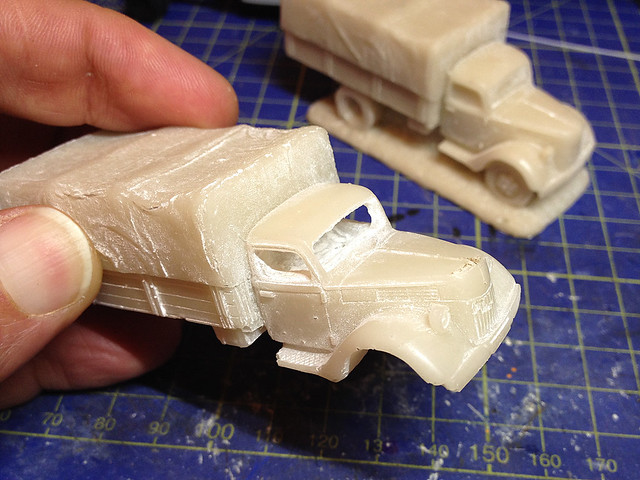
A bit rough and ready but the best I can do without removing the cab's roof to excavate the bottom half of the interior. And I don't want to do that because by the time I have drilled and shaved away and interior and carefully re-attached the roof I might as well have done this all using my 'cut & shut' method - and we want to try and make this a quick project, right?
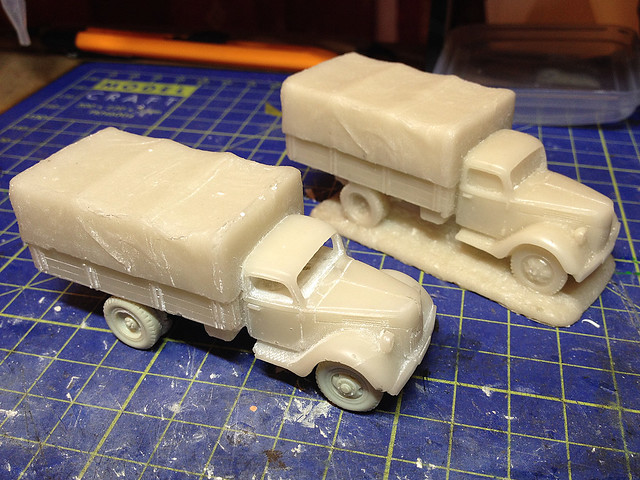
However, even at this stage it's a bit of an improvement over the original solid one-piece model...
By adding some additional detail - like a transparent windshield - and with some careful painting I should be able to create a simple model that shouldn't look too out of place next to my plastic multi-part kits. Hopefully!
Next: Basic paint coat and cab interior detailing.
I made a very rudimentary chassis for my Valiant V3000. Just some plasticard bits and pieces, but enough to add some simplified detail to support the new wheels.
The model is now 'free standing' and I can mount it on one of my own bases to match the rest of my models from my Finnish collection. Having done this I need to finish tidying up the truck's excavated cab...
A bit rough and ready but the best I can do without removing the cab's roof to excavate the bottom half of the interior. And I don't want to do that because by the time I have drilled and shaved away and interior and carefully re-attached the roof I might as well have done this all using my 'cut & shut' method - and we want to try and make this a quick project, right?
However, even at this stage it's a bit of an improvement over the original solid one-piece model...
By adding some additional detail - like a transparent windshield - and with some careful painting I should be able to create a simple model that shouldn't look too out of place next to my plastic multi-part kits. Hopefully!
Next: Basic paint coat and cab interior detailing.
Sunday, 16 March 2014
Quick Ford V3000S (G198TS)
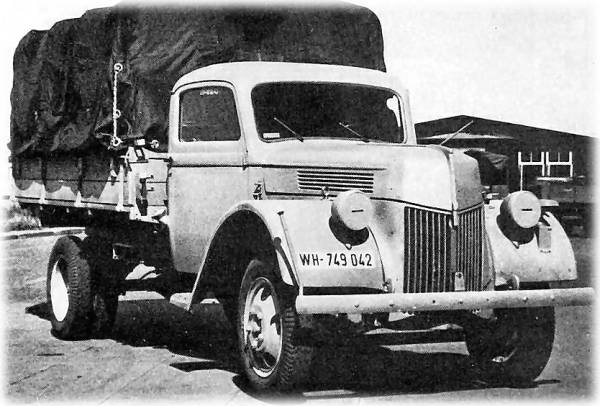
| Picture source: Engines of the Wehrmacht |
To be honest I just couldn't resist tinkering about with one to make the one-piece model more like the multi-part kit that I am using for my Finnish army project. But, having said that, I still wanted to do this with as little fuss and as quickly as I could...So some sort of compromise was in order.
What I decided to do - in essence - is as little as I possibly could to complete this model. Just enough to satisfy my aesthetic sensibilities, but without the normal fiddly and time-consuming alterations that typify my normal conversions. So without further ado, let's get going...
1. Let's get rid of that one-piece integral chassis and base...
What I have in mind is to replace the one-piece wheels with as set of wheels made from one of my kits. In the same way that Moonlite Modelwerkes makes it's resin trucks...
| Moonlite Modelwerkes makes their wargaming models 'free standing' by adding a set of resin wheels to the 'one-piece' body. |
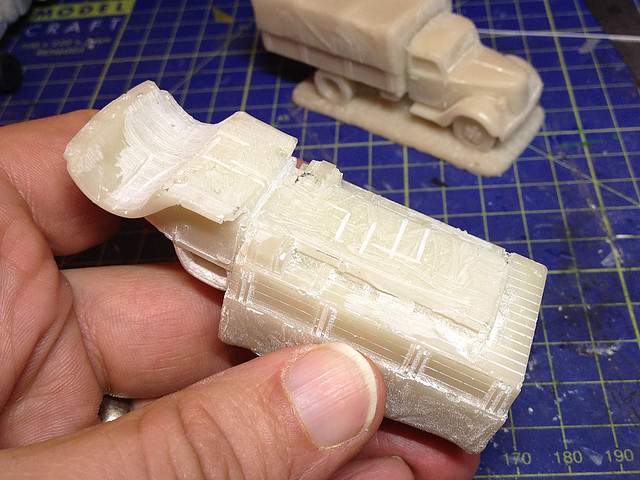
2. I next alter the other characteristic feature of one-piece 'ready to roll' wargaming resin trucks - the filled in cab and solid windshields...
This is a wee bit tricky and demands a steady hand. Basically I carefully drill out the solid insides of the cab using my trusty Dremmel. I will have to finish off the edges of the windows by hand to make sure I don't destroy any of the nice detail and - of course - I cannot excavate all of interior. What I will end up with is an empty area at the top half of the cab, from the dashboard to the roof.
However, if I paint the interior a dark colour and then dirty up the windows I intend to fit then you perhaps won't notice the interior isn't all there. Hopefully.
OK, moving on quickly - I next will make my new chassi and add the wheels.
Subscribe to:
Posts (Atom)