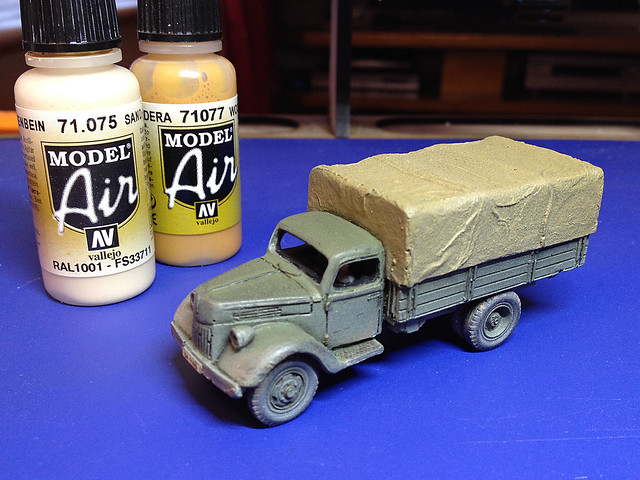
As mentioned in my previous post about this project I was not happy. Things hadn't gone right with this model right from the start, a lot of the problems came about because this is the very first model I have done where I have relied a lot more on my Revell airbrush...No rattle cans used this time! (Except for the black primer.)
I just couldn't get the paint consistency right. Colours weren't right, coverage wasn't right and piling on further layers just didn't make me any happier. As said, a bit of this was due to lack of planning, but I was also frustrated by using new equipment and techniques that I needed more practise with.
Chief problem was the paint mixture. I didn't get this right and I guess I was spraying with overly thinned mixture, therefore everything was too pale.
Well, I finally twigged what the problem was and went out today and bought a couple of bottles of Vallejo's Model Air colours. The results were terrific as these are pre-mixed paints, designed to be used in your airbrush straight out the bottle...
 |
| I now have to re-shade and re-weather the tilt now it's the right colour. |
I'm sold on the Model Air paints as they take the guess work out of airbrushing for a novice like myself. I was able to add a fairly subtle (for me) film of dust, modulate the colour of the tilt and improve and even out the muck on my tyres.
So, it's now Sunday night and I certainly haven't made as much progress with this or my 1939 Chevy model as I had wanted to this weekend. But the discovery of these wonderful paints made up for my poor modelling efforts as I am now more confident about using my airbrush and can begin to experiment with some subtle shading effects.
Finally, A big thanks goes to my local general store - Boyes of Scarborough - which was open on Sunday and stocks the full range of Vallejo paints in it's hobby section.
No comments:
Post a Comment