
This led me into a bit of a think about why I (and other people) use primer paints for modelling. I guess I did so - in the beginning - ‘because that’s what people did’ (as a complete beginner I believed without question whatever ‘experts’ told me was the ‘done thing’).
There’s a really nice article on the purpose of using a primer over on Scalemodelguide.com - 'All About Primers' - which is worth a read, just to remind one’s self what priming is all about. Reading it over, some of the reasons for using a primer ticks a few of my personal boxes - specifically (in order of precedence):
• Improve the adhesion of top-coats
• Showing up surface defects
• As a Pre-shading layer
My initial reason for using a primer was that I considered that acrylic paints need a preparatory surface for adhesion (unlike the enamels I used when I was a kid). Also, I initially (and still do occasionally) use a flat black primer as an aid to shading, but in the case of my T-50 I wanted an underlying vivid green to give some luminance to my top-coat green (if that makes sense).
The highlighting of defects was something that developed into a useful and unexpected role for applying a primer. As I have gotten more into the converting of models I often find that that 'good job' of sanding a repair or modification isn't such a good job, after all, once I get the first coat of paint on it! Priming highlights these glitches and gives me a chance to correct them before re-applying a spot of primer over the top of them.
It's worth reevaluating your model painting process regularly, I think, as you can get into a habit of doing things without reviewing their relevancy. As each model is different and so might need a slightly different approach, it's good to ask oneself 'why am I doing this again?' every so often!
The base ‘Finnish Green’
I have settled on a darker - slightly olive - green for use as the Finnish ‘Moss Green’. This will not be to everyone’s taste (many modeller's prefer a brighter green for Finnish armour), but I have gone for this shade/hue due to consideration of those examples still in museums which experts in this area deem ‘good’ examples of period Finnish camoflague. I have also gone for a darker green due to the ‘scale effect’ - or, to put it another way, what I think looks right at a distance.
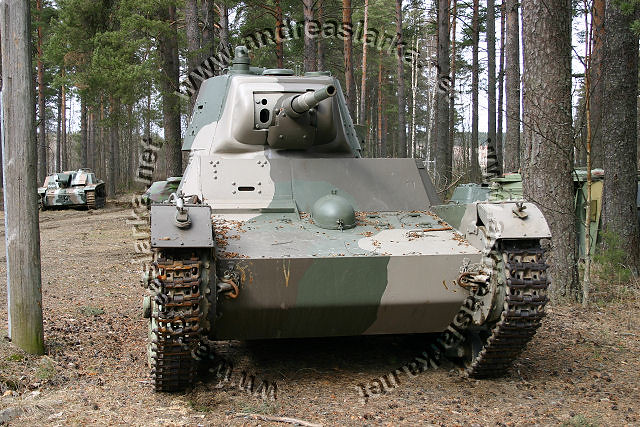 |
| This photo, of a nicely restored Finnish WW2 tank, comes as something of a surprise to many modellers. It's not exactly the typical 'Finnish 3-colour camo' that modellers are used to seeing on much of the relevant kit box art! Source: Andreaslarka.net |
My green is a 50/50 mix of Vallejo’s German Camo Dark Green and their Yellow Olive. The olive sheen is very (very) subtle, depending on the light...

Next: The camoflague.
No comments:
Post a Comment