This stage is - particularly for the novice/intermediate modeller - is something of a dark art. I feel like getting out my charms and spell book and uttering a few incantations before I begin the weathering of my models.
I am always dreadfully nervous and worried that this is the stage that I am most likely to ruin any good work that I might had done thus far! Which is why I prevaricate so much and am hesitant to put brush to plastic...
 |
| Bleaching and staining. |
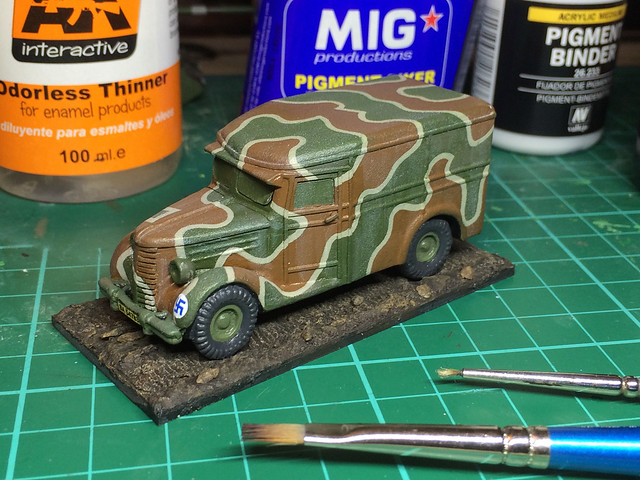
My Finnish Chevy van is supposed to be an early war era vehicle that has chugged along to 1944 (I have photographic reference on which I can base my work). This is why the truck has a non-standard camo scheme and early war Finnish insignia. By 1944 this venerable van should be pretty banged about so my level of weathering will reflect this.
As usual, I begin by streaking white artists oil paint to indicate paint bleaching. The untouched areas between the streaks - where the original paint scheme is left quite vivid - serves to give the impression of water damage or streaks. I follow this up with subsequent streaks of grime, light rust and fuel stains with different colours of oils - narrowing the streaks to indicate 'drip damage'.
Dust, mud and chipping
After this colour modulation, I begin to add dirt and minor paint damage. For this, I mainly rely on a mix of Vallejo pigments and Tamiya Weathering sticks.
The chipping is various spots of panzer grey or dark grey and purple mix. In my opinion, a touch of purple gives a nice impression of bare metal that is just starting to develop a touch of surface rust. But in this case, I have decided not to go over the top and the chipping is quite subtle (hopefully).
Not so the dirt...I fancied a dirty old van!

As you can see in these photos, I have part-completed the vehicles base. However, I have not added the static grass - which I have been adding to my Finnish model's bases - as I wanted to match the colour of the mud on the base to the colour of dirt I was adding to my model.
I think I will add some final mud splashes, before I call the weathering complete and finish the base. Then I'll peel off the masking tape, which is protecting the windscreens, and add some dust to the windows.
No comments:
Post a Comment