Thursday, 25 March 2021

When is a Kit not a Kit? Part 2

 Previously, I did a post about whether 3D printed models could qualify as making. Well, here's another little conundrum which is maybe even more though provoking...

Is a 'virtual kit' still a kit? πŸ˜•

Let me explain. I've been playing the PC game 'TANK MECHANIC SIMULATOR' for a while now - in this game you take on the role of a tank museum curator (and his staff) and you are tasked with collecting and renovation old tank hulks so that you can display them in your museum!

I find this game very relaxing, it's sort of a 3D virtual jig-saw puzzle in a way. Nothing too mentally taxing, though you can up the challenge by stripping the tanks right down to the last nut (which is what I do). Reassembling them in the right order can be a bit of a head scratcher! πŸ˜†

Above: You begin your Tank Mechanic Simulator project with a real junker! Aside from
being a rust bucket you will find that there are many parts missing which you will have to
source or craft in order to be able to renovate the tank! (Pzr. III)

Anyway, my point is two-fold. First of all, as a scale modeller I find this process very educational and it gives me a real insight into how complex some of these armoured vehicles are. It also gives me a real insight into what some of the components are and how they fit together, which is a real boon when you are taking on a complicated plastic kit.

Being able to see inside a vehicle that you are making a plastic kit of can be very useful, especially is you a super detailing your model.

Above: (Panzer III) Stripping back the tank to it's basics and slowly replacing the
missing components is very relaxing. Here you see me about to spray the new bits
which so far have just been primed in red.

But also, and my main point is, even though this is virtual assembly you still get a kick out of completing, painting and adding the decals on the tanks in this game. And it's a lot less messy!

Now, I'm not going to be as stupid as to try and convince anyone that a game like Tank Mechanic Simulator is any real substitute for the physical craft of scale model making, but as I have pointed out it can be a useful and satisfying ancillary hobby for modellers.

Above: You get a real sense of elation when you finally complete a tanks in this
game. Here I have put back together my Panzer III, I can now sell it or place it
in my virtual museum!

As the game progresses you access bigger and more complex tanks to challenge you. I have reached the pinacol of the available tanks - so far, but more are in development - with the German Panther & Tiger and the Soviet KV-2 and American Pershing! Believe me when I say that the more complex tanks can really make you sweat!

Above: The interior of the German Panther tank (using the x-ray mode). This gives
you an idea of just how complex the late-war tanks begin to get. Believe me when I 
say that there is nothing more frustrating to finally complete a tank like this only to
find that you forgot one small component hidden deep inside!

There is lots more to this game I haven't covered - like the excavating for buried tanks, painting camo schemes and organizing your museum - but the renovation and construction are most relevant to model makers I guess.

Eventually you do work your way through the dozen tanks that come with the game, but the developers do have a long-term plan for the game and are adding some very interesting projects to the game in the future. I'm absolutely ecstatic at the idea of doing a Churchill tank and Lordy - that Maus!!! 😁


Tank Mechanic Simulator is available on STEAM for £15: https://store.steampowered.com/app/407130/Tank_Mechanic_Simulator/

Tuesday, 16 March 2021

1:1 Scale S&W Model 10 'Kit' - Part 3

 Moving on the base colour painting of the revolvers grips, I began with another round of masking!

First of all, as you can see, there was the fine masking of the outline of the grips. But then, as I had already base-coated the frame in black, I also had to find a way of quickly masking the rest of the gun to prevent any over-spray...

Yep, a plastic bag (actually a stay-fresh sandwich bag)! Quick and very convenient.

I then laid down a base coat of a hazelnut paint, but as the grips are meant to be wooden I wanted to try and create a multi-tonal background for the fake wood-grain effect I had planned to go over this. So, I did some light dry-brushing with various shades of brown to create a streaking effect...


This completed my base layers onto which I would apply my finishing weathering effects. But before I begin to start these I decided to take a very quick snap of the progress so far and apply a filter to get an idea of how I might approach the final photography for this project...

Will I eventually go with a sepia effect or just a straight noire-like B&W photograph for my set of props for this project? Sepia does give a bit of a vintage look but it's a bit false in my opinion as by the 1930s sepia photographs were already a little anachronistic.

I think I would prefer to go with a slicker and moody black and white. It's more evocative of the hard-boiled detective movies of the time.

While I now start to plan my weathering of the revolver model I'm also starting to look around for the rest of the period props to go with the gun for the photo-diorama (I plan a shot of a detective's desk with several items and nick-knacks relevant to a 30s detective). In fact, I've already picked up my next prop...

Above: Dress Up America 939 Kids Pretend Play Police ID Wallet

I thought a detectives wallet, ID and badge would complement the revolver really well. Obviously I would have to make up a realistic ID and badge - both of which will be the subject of my next project once the revolver is complete. (I was thinking - maybe - an FBI badge?) 

NEXT: Weathering the revolver.

Tuesday, 2 March 2021

Emperor Augustus Bust Model

 As I've mentioned before, one of the main reasons I take so long to complete projects is because I tend to jump between multiple projects, going from one job to another depending on how I feel at the time. And sometime I might not even get back to a particular project for quite some time (I'm looking at you K7 truck)! πŸ˜„

Anyway, today I'm working a new 3D bust model, another classic Roman statuette of an Emperor  - Augustus (I am a big 'I, Claudius' fan and particularly enjoyed Brian Blessed's portrayal of the Emperor who gave us the name for August)!

Above: A statue of the first Roman Emperor Augustus (r. 27 BC - 14 AD) as
a younger Octavian, this sculpted artwork dated to around 30 BC. It is located
in the Museo Capitolino of Rome, Italy. [Credit: Wikipedia.]

I was kinda drawn to this new project as I'm just reading John Williams's 'Augustus' - 'A brilliant and beautifully written novel in the tradition of Robert Graves’ I, Claudius, Augustus is a sweeping narrative that brings vividly to life a compelling cast of historical figures through their letters, dispatches, and memoirs.'

Modelling Challenge
This will be my third 3D printed bust and I've still got lots to learn about the technicalities of preparing and setting up 3D files for printing. One of the issues I'm trying to make sense of is how the orientation of the model file on the printing plate can effect the quality of the print. Additionally, I want to find out more about how supports can be set up to get the best results.

So, this time around I'm changing the orientation of the model on the bed AND trying out a different type of support (and number of supports)...

The bazzilions of 'legs' look rather disconcerting and I did worry that having so many supports might affect the quality of the print, what with all the contact points from all the supports. And as it trned out, I was right to worry...

The result looks bad, but in a way it is quite positive as well because I feel that I am getting a sense for how things work. The fact that I had a 'premonition' that there were going to be problems means that I might be getting better able to avoid them in the future (maybe). So, I'm not too down.

Another positive was that - as I had hoped - the unsupported front of the bust printed out perfectly...


And even though the back of the head was a bit of a mess, it was the back of the head AND after a bit of a clean up I could see that it might be fixable...

So I got out my MILLIPUT putty and had a bash at recreating the damaged hair. I had to use my imagination a bit but - as I said - it is on the back of the statuette so I wasn't too worried...


My 'hair' attempt is a little prominent so I shall give it a bit of a sand to help blend it back into the rest of the model. Even so, it does feel good that I can deal with problems like this wen they occur. I'll just carry on experimenting with my prints and try to get better and better at preparing my models so that they have the least amount of problems.

Here's the completed model, though I might add a small plinth to it later...

Saturday, 27 February 2021

1:1 Scale S&W Model 10 'Kit' - Part 2

Painting the Prop Revolver...
Because the cylinder included additional detail - such as the bullets in the chambers - I had to begin the base coating by spraying this part first before installing it...


I'm applying this base coat using a satin acrylic spray. I did some research about how other people painting prop guns and I decided to go for a black base and then to apply a powdered graphite dusting which I would then polish up for a gunmetal metallic finish... Fingers crossed!

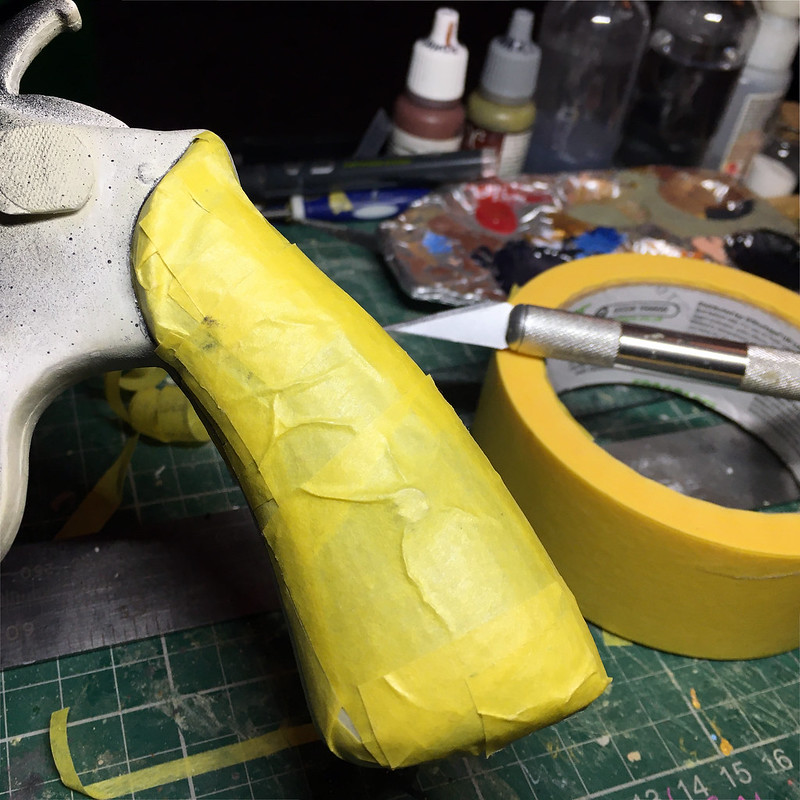
But before finishing of the rest of the frame in the black I would have to mask off the grips - which I will be giving a wood effect finish. I began by sketching out where the frame and grips would be before applying the making tape...


Now, the astute among you will probably be saying 'why didn't he spray the wood colour base coat before he masked out the frame'? Good question, and the simple answer is that I don't have the right colour brown at the moment but want to crack on with the job! πŸ˜–

One of the down-sides of this current lockdown is that I can't just pop out to my local hobby shop, most of my stuff has to be ordered from Amazon (if they have it). The consequence of this is that when the correct brown spray arrives (and I did toy with the idea of just hand painting it) I will have to re-mask the revolver again to spray just the grip!

Anyway, moving on quickly... πŸ˜‘

SO, I sprayed the frame - I'm kinda disappointed that my airbrush is out of action at the moment so I'm having to resort to using a rattle can spray BUT because the surface of this print is so uneven (despite my efforts) I'm thinking the extra thickness of basecoat is probably a good thing! πŸ˜‰

This gives me the basic black I need to start to build up a metallic look and that's what I'll be testing next as well as - hopefully - working on the 'wood' grips!

Sunday, 21 February 2021

1:1 Scale S&W Model 10 'Kit' - Part 1.5!

 A bit of an addition to Part 1 of this project, but not quite Part 2 (the actual painting)...

This is one of those occasions where choosing the 'easy' option turned out not to be so easy after all. I chose this particular 3D model of a revolver to print as it had the fewer component parts - this was achieved by the designer by crating the 3D file from a 3D scan of an original object. (There was an alternative revolver model on THINGYVERSE that was a proper 3D constructed object with multiple parts BUT it did not have the option for the 'snub' nosed version of the gun.)

Now, I'm only a novice at all this 3D modelling stuff but one thing I seem to have noticed is that while 3D scanning is great for producing a very quick virtual model of the object you want - none of that tricky 3D design stuff - it has one slight downside. The cheaper 3D scanners don't seem to be hugely accurate or of tremendous resolution and seem to result in some unwanted surface imperfections (which gives the model as sort of weird mottled texture).

Above: Here is a preview shot of the scanned 3D model gun's cylinder that
I chose to make. Note the uneven and wrinkly surface texture!
Above: Here is the cylinder from an alternative revolver model which
was created in a 3D design application. Note the smoother, even surface.

The upshot of this - in the case of my model gun - was that what time I saved by using a low component model I lost by then having to do a LOT of surface clean-up! Du-Oh! 😣

Hi-Ho, Hi-Ho, It's Off To Work We Go!
In Part 1 of this project I got to the point in the model construction where I thought I had a model ready for painting (which would have been Part 2). Er, no...

Above: All my 'completed' components laid out 'ready for painting'!

The main problem arose - as it often does in modelling - when the primer was applied to the model. In this case I was already somewhat aware of the uneven surface texture of the model but hoped that the filling and sanding I had already done had taken care of the worse of the defects. BUT, as an extra precautionary step I decided to use my new filler/primer spray rather than just a normal paint primer as a base coat.

Now, the down side of priming can be that the smooth base coat layer can have the effect of highlighting any more subtle surface defects that you perhaps didn't notice when the model was in 'the raw'. And such was the case with my revolver...

Above: Applying Plastic Putty to some of the deeper dinks!

Although the thick and gloopy filler putty spray did help smooth out some of the more shallow wrinkles in the scanned model I found that there was still some pitting here and there. So, 'plan B' was to try and rectify these with an extra surface repair material - Vallejo's 'Plastic Putty'.

Plastic putty is a funny stuff, it's an acrylic (water based) putty - almost a cream in consistency - that can be squeezed or brushed onto the model and when soothed out onto the surface - like plaster - fills seam lines and slight gaps.

An alternative to this product is 'Mr. Surfacer 500' liquid putty, but I like the immediacy of Plastic Putty. This is also why I am using it instead of my usual go-to filler putty - Milliput - which demands to be left to cure for 12 hours before sanding.

I simply dab on small dots of plastic putty to cover pitting or squeeze out a thins line of putty in the case of seam lines...

Then I use a wetted smooth and wise brush to gently smear the putty into the defects and carefully blend the excess out over the surrounding area. I leave the putty for just a few minutes - this is all it needs to start drying, be warned - and then I further blend away any unwanted putty...

As I say this is a great 'quick fix' approach which is rather more of a cosmetic technique. Deeper faults would require something like Milliput and plastic putty does have it's downside. Too much excess putty is bad as while you can sand it - after at least and hour of curing - it doesn't sand brilliantly well. You can run the risk of chipping or tearing off some of the repair work you have done if you aren't careful... So, be careful! 😁

SO NOW...

I think I am ready to start painting! LOL

Tuesday, 16 February 2021

1:1 Scale S&W Model 10 'Kit' - Part 1

Well, no sooner had I decided that multipart 3D prints can count as 'kits' than I started on my next project. This time it's a life size revolver!


The background for this is my interest in solo role playing - I'm a fan of the Lovecraft Mythos horror - and unlike group RPGs it's somewhat harder to 'get into the spirit' of the game so heavily based on atmosphere as is a Mythos 'investigation'.

'Call of Cthulhu' is one of the most popular Lovcraftian Mythos RPG systems
and it includes a nice solo scenario which is my preferred means of playing.

(For those of you not familiar with a Mythos RPG - like 'Call of Cthulhu' - it's part horror and part detective story. Think of Scooby Doo if it were directed by Wes Craven!)

Anyway, to get into the mood some solo players like to 'dress' their game table with some suitable and relevant 'props'. In my case I am collecting a few items reminiscent of a 1930s private eye - hence the S&W 'Detective'-style revolver (I'm a big fan of the 1930's hardboiled detective movies)...


Trouble Is My Business...
3D Printing a model is - for a novice like myself - can be a bit of a challenge in itself, but as this will be a prop it will add an extra modelling dimension to the project. After printing I will be painting the model and trying to achieve as realistic looking effect as I can - I'm just not quite sure if my painting skills are up to it. We shall see...

To begin, I found the model I wanted on THINGYVERSE (well, I actually wanted a Colt Detective .38 but the S&W was the next best thing). The model isn't very complex and looks like it was 3D scanned so the texture is a little janky, but passable for a prop...


On the positive side, as the picture above shows, the model files included to versions of the S&W Model 10, the standard 6 inch barrel version and the 2.5 inch 'snub' which I want.

Not having so many parts to print has it's pros and cons. The model was quicker to print the parts there were (4) BUT it does mean that it is somewhat less detailed and, of course, there are now working parts. [There is another more complex model which is a true multi-part model with all the real revolvers main components as separate objects for printing. But this just comes as the 6 inch version.]

3D Printing Strategy...
As I learned from my recent Athena bust print having the ability to print as one or a few pieces maybe nice but I found I could squeeze a little extra quality out of the file if I sub-divided some of the more tricky parts using the slicer software. Doing it this way - breaking down the model - also meant that I was less worried about having to use a lot of print support and that they might not work.

So, I decided to cut the main revolver frame into two halves for printing...


However even this proved to be a little complex as the revolver's cylinder included the chambers and the bullets and this caused some unforeseen problems and the chambers fouled up with excess filament and there was a defect in the cylinder itself. Still, the rest of the frame turned out not too bad...


So, my solution to this - and so as not to waste a lot of the print - was to reprint the cylinder as a separate component and additionally slice it into two halved so I could get the best detail out of the chamber and bullets...


And so, this is what I ended up after a couple of days of printing (I printed at the best quality to see if I could alleviate the rather rough surface texture)...


Print Cleanup...
Now the tedious bit, a long session of trimming of flash and sanding out any rough spots before gluing the halves of the major components together AND THEN even more sanding to smooth out the joints and seam lines.

Funnily enough, I'm still not 100% sure what type of glue is the best for sticking PLA parts together. I've been using super glue to play safe, but I must look this up. The good thing about super glue is it can help fill seams between joined parts.

Using Milliput putty to fill defects and gaps. Here I have printed a new
catch as the original was badly formed, I have also applied a thin layer
of Milliput which I then ran a knurled handle over to create checkering.

I'm finding that PLA isn't the easiest material to sand, not like kit plastic or resin, and too heavy abrasion can end with breaking down the fibrous layers that the 3D extrusion comprises of. So, you have to be careful, filling and sand is preferable.

And this is where I am at at the moment, continuously finding small blemishes and uneven surfaces that I feel I have to attend to. In the meantime, however, I'm starting to think about how I might paint the finished model. I have several possibilities of finishing techniques but I also have a couple of alternative finishes I could go for - gun-metal blue or nickel...

Dare I take a stab at a nickel finish? ...Er, maybe not!

In preparation for the assembly of the model I did  'dry' test assembly first, just so I could plan how I would put the separate components together as I may have to add some supports of some kind...


I identified a couple of potential problem spots and decided I it would be best if I added a rod that would pass through the frame and cylinder to hold it in place properly. Otherwise, there doesn't appear to be any major issues.

NEXT: In part two of this project I will begin to paint the assembled model.

Saturday, 13 February 2021

When is a Kit Not a Kit?

 OK, this sorta has me scratching my head a bit. Is a multipart 3D model a kit?

The reason this is confusing me a little is that there seems to be a pretty distinct demarcation line in the modelling world between a 'kit' and a 3D printed model. But let me explain my quandry...

Busted!
It had to happen. So far my 3D printing adventures have been pretty much disaster free, that was until I took on something a little more complex and a little larger than my normal print models. As a history fan I was very taken by some of the classical statues and busts that are available over on the  THINGYVERSE 3D model repository so I - nervously - attempted a scaled down test of Emperor Claudius...

As you can see from the above photo of the finished print, everything when surprisingly well and I was very pleased with the quality of the result. So much so, in fact, that I was very keen to try another (though these are very long prints - around 9 hours or more for a 10cm high bust) and I decided I would do a series of classical busts.

My next attempt was a miniature version of the famous Athena of Velletri (a copy of which is in the Louve) and I set the print settings up exactly as I did with my Claudius hoping that I would get the same excellent print results...Oh dear...


Much to my horror after 11 HOURS of printing - where everything seemed to be going just fine - I noticed that something wasn't quite right. And sure enough, when the print ended and I removed the network of supports that encased the print there was a prominent defect across the shoulders, neck and chin of the bust.

So, How Do I Recover from a Print Disaster?
As is obvious, I am new to the world of 3D printing, were I not new I might have the experience to have avoided such a frustrating failure. But, trawling some of the 3D printing forums I notice that I am not the only one who has these 'oopsies', it seems to be a common pitfall for all new printers.

However, here's where my background in plastic scale model making perhaps makes the difference...

I note that for many 3D print novices there seems to be this notion that the goal is to produce the 'perfect print' and - yes - that is a nice idea but when there are so many things that can go wrong having a strategy for when things go wrong seems only sensible. Too often I have seen examples where novice printers simply try, try and try again - always in search of that illusive golden print!

That was not my instinct, for me the kit makers philosophy of 'how can I save this model' kicked in. As much as anything else I just couldn't bear the idea of abandoning 11 hours 'work' and the 7 meters of PLA filament that had been used to make a model that was 75-80% perfect... What could I do to rectify the 15-20%.

Repairing a 3D Print
As I said, it seems to me (though this probably isn't completely true) that many 3D newbies are after perfection and some maybe don't have the modelling skills required to make pleasing repairs. It seemed quite natural to me - a modeller - to want to 'make good' the bad bits in my print. So, my first idea was to simply cut out some of the duff parts and replace them with nicely printed pieces...

Luckily doing this is made pretty easy using the 'slicer' software (Flashforge Flashprint) - this is a program that prepares 3D models by dissecting the model and translating it so that a 3D printer can make up the model from extruding (squirting out) layers of molten PLA filament! 😁

As it turned out, it was a little more complex than that (isn't it always with me). And, just to make things a little more interesting I decided to experiment with cutting up parts even further to see if I could get the best quality prints that I could...

To be honest, it just meant that I had to sit down and do some serious planning about how all the parts would come together... Like a kit!

I find it interesting that there seems to be some sort of perceived division between traditional kits and the new craft of 3D printing. There is a area of cross-over. In fact, looking into it further I discovered that people like me who have a small 3D printer often use the work-around of cutting up large prints into smaller components and then reassembling the output into a large model that they otherwise could not print. In other words, they make kits.

Parts made I then had to stick them together - using superglue, although I was not quite sure what was the best thing to use for PLA - and there were a few little gaps here and there that needed to be filled and smoothed away using fine white Milliput putty...

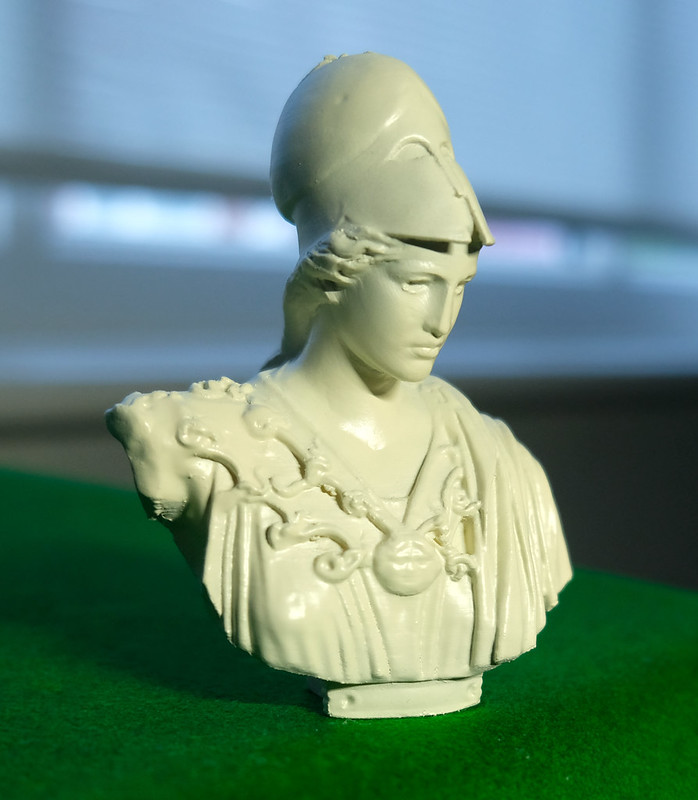
Originally my idea was to have the bust model I am doing as they came off the printer in plain white PLA. My Claudius figurine looked great, but with the obvious repairs in my Athens (as it turns out there is 'white' and then there's 'white) I rethought this idea. Actually, the starkness of the white PLA was a little to intense - even my wife and daughter commented that it was 'too much'. And so, I decided to give the model a coat of paint.

To help disguise and cracks I first primed Athena with some of the new filler/primer spray I have bought - this settles into any small lines - and then I use an off-white colour to give the bust a marble look. I was very pleased with the final outcome (especially as the Rust-Oleum Painter's Touch 'Ivory Beige' spray turned out to be a satin paint)...