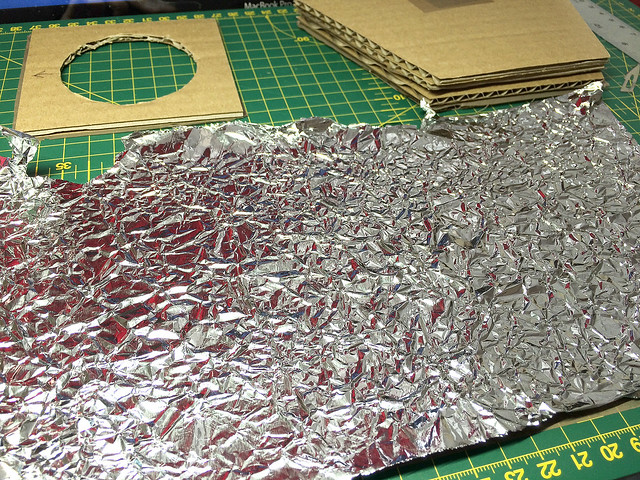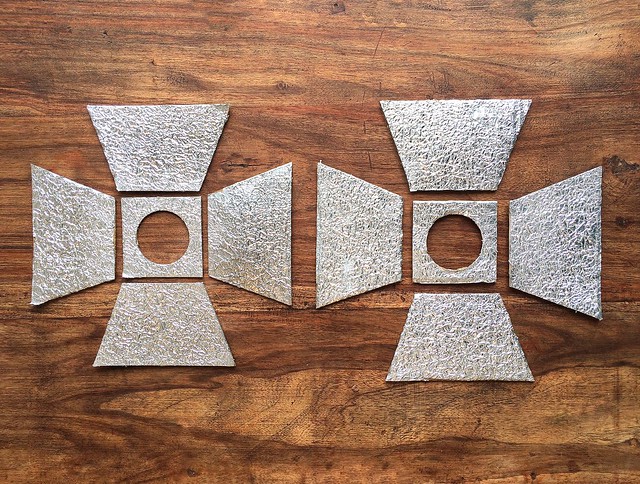
Right, last part. In this post, I put all the components together and try out a test photo to see if the quality of the light which is given out by my mini-studio lamps is improved. But, first of all, let's look at the foil covered components...
Now, I should mention - this being the first time I have tried using box cardboard as a construction material - that the first thing I learned is - go easy on the PVA!
The cardboard was more absorbent than I expected and it soaked the PVA up like a sponge. This lead to some floppy and soggy components which took a lot longer to dry out than expected. Too much PVA glue also caused the wet card to deform (I had to place some heavy books on them to flatten them out).
Despite this, I still think cardboard is the ideal medium for this project because of its light weight.
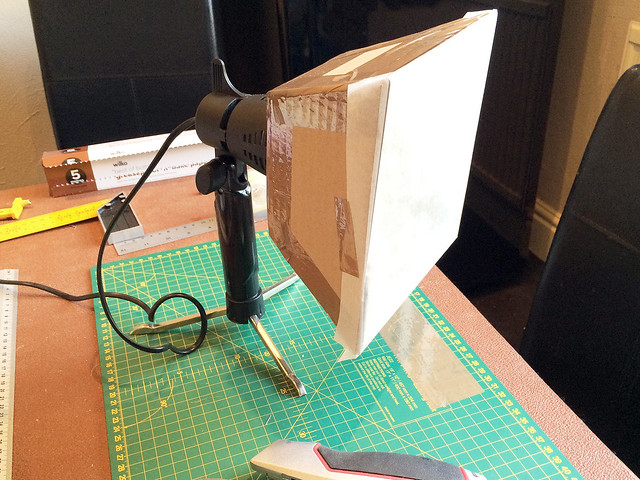
Next, I reconstructed the boxes...
Once again, I used parcel tape as the primary means to connect the components together. Once I am satisfied with the fit I will be gluing the parts permanently to one another (probably using a glue gun). At this point, the tape will help to hold things steady and in position while I glue one joint together at a time.
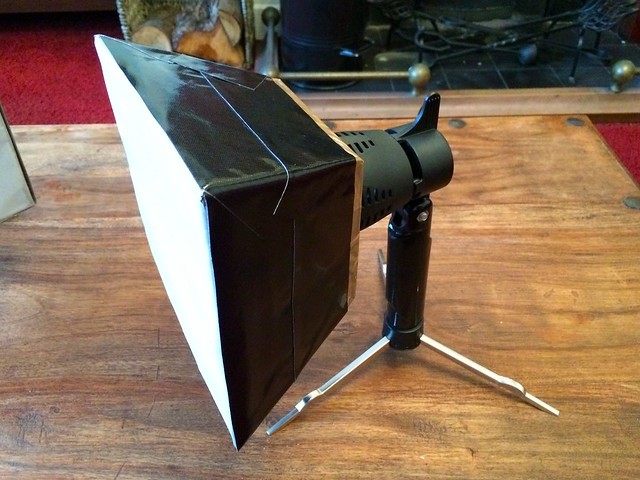
To make the boxes a little more sturdy I covered them in black 'Gorilla tape' (which is a pig and sticks to everything but the thing you want to stick it to). So, that done, it's time to test out my 'new' lamps...
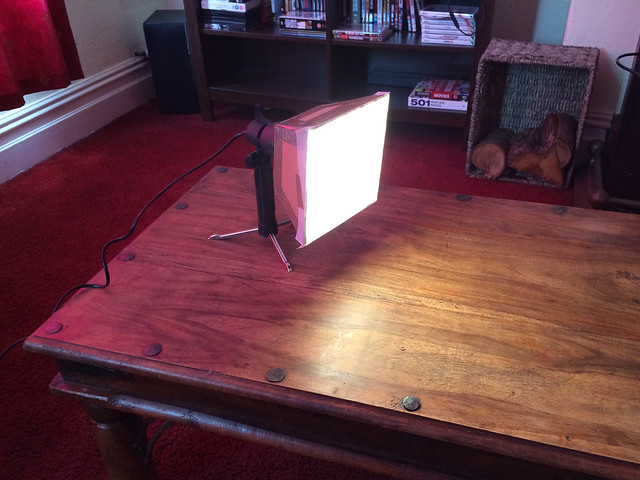
As a test, I'm just going to use a two lamp set up to see what kind of spread and softness they produce (normally I might use I would use three or even more lamps depending on the lighting effect I want) but if I can get away with two, that would be terrific!
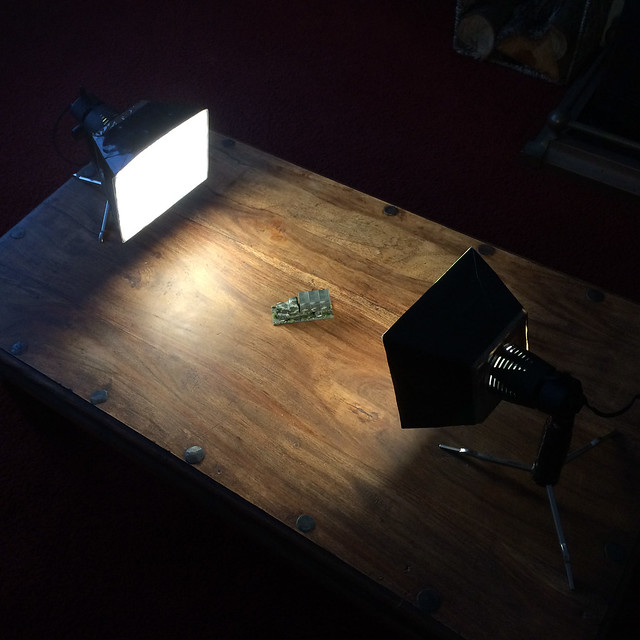
Not a bad spread. Before I made these 'soft boxes' - using LED bulbs - the halogen bulbs when intense mini-spot lights and were far too aggressive. They created a very hard light effect with high-contrast patches with deep shadows and blown-out highlights. But now...
Well, that's not a bad result. I haven't modified the exposure of light effect post (in Photoshop), this is 'as shot'. As you can see, the spread is fairly even and not too contrasty.
I'll count this project a success as I already happier with this snap (just using my iPhone) than I was with the last 'finished' model photo I took. And the best thing is that this didn't cost me a lot of money (at one point I was so disappointed with my photography I was seriously considering buying an expensive set of studio lamps).
Diary of a novice scale model maker and his adventures in the wacky world of Braille Scale.
Showing posts with label photography. Show all posts
Sunday, 15 May 2016
Sunday, 8 May 2016
Photographing models - improved lighting Part 2
The diffuser
Having sorted out the shape and how to construct my mini soft-box, it's time to try the contraption out and see whether it actually works! As a diffuser, I took the advice of some of the feedback I have had (than you) and am trying out grease-proof baking paper (£1 a roll from Wilkos)...
I was worried whether this material would be a bit too flimsy, but in the end, I figured that even if I have an accident and pierce the paper-like diffuser I have a whole roll of spare material with which I can replace the damaged piece.
At the moment, you'll notice, the soft-box is held together with tape. This is just so I can quickly put together the prototype and - importantly - take it apart again to use it as a template for a second one. I also need to deconstruct the box so I can add a reflector surface inside the box.
Time to try it out...
Well, that seems to be OK! It has, as I hoped, produced a less focused and softer light which has a wider 'spill'. Although, what you can't see is that there is a bit of a hot spot in the middle, but I how to alleviate that a bit by adding a reflective surface on the inside of the box.
The reflector
The reflective interior of the box will be made of a foil material, probably kitchen foil which would be in keeping with the 'bargain basement' nature of this project. However, I have had suggestions that I crumple the foil first and then flatten it out again so that it's an uneven reflective surface.
I'm sure there is a logical scientific reason for breaking up the surface like this, but I don't know what that is. All I do know is that my professional video soft-box lighting has this sort of crinkly reflective surface on its interior. So, let's see what I can do with cheap (Wilkos) kitchen foil...
The next question is - how do I stick the foil to the cardboard? I wonder if good old PVA would do the job? Only one way to find out...
...Yep. That worked fine. I was a bit surprised! Now to cover the rest of the parts.
Next: I reconstruct the box and test the completed 'mini-studio'.
Having sorted out the shape and how to construct my mini soft-box, it's time to try the contraption out and see whether it actually works! As a diffuser, I took the advice of some of the feedback I have had (than you) and am trying out grease-proof baking paper (£1 a roll from Wilkos)...
I was worried whether this material would be a bit too flimsy, but in the end, I figured that even if I have an accident and pierce the paper-like diffuser I have a whole roll of spare material with which I can replace the damaged piece.
At the moment, you'll notice, the soft-box is held together with tape. This is just so I can quickly put together the prototype and - importantly - take it apart again to use it as a template for a second one. I also need to deconstruct the box so I can add a reflector surface inside the box.
Time to try it out...
Well, that seems to be OK! It has, as I hoped, produced a less focused and softer light which has a wider 'spill'. Although, what you can't see is that there is a bit of a hot spot in the middle, but I how to alleviate that a bit by adding a reflective surface on the inside of the box.
The reflector
The reflective interior of the box will be made of a foil material, probably kitchen foil which would be in keeping with the 'bargain basement' nature of this project. However, I have had suggestions that I crumple the foil first and then flatten it out again so that it's an uneven reflective surface.
I'm sure there is a logical scientific reason for breaking up the surface like this, but I don't know what that is. All I do know is that my professional video soft-box lighting has this sort of crinkly reflective surface on its interior. So, let's see what I can do with cheap (Wilkos) kitchen foil...
The next question is - how do I stick the foil to the cardboard? I wonder if good old PVA would do the job? Only one way to find out...
...Yep. That worked fine. I was a bit surprised! Now to cover the rest of the parts.
Next: I reconstruct the box and test the completed 'mini-studio'.
Thursday, 5 May 2016
Photographing models - improved lighting Part 1
I've been having a bit of a trouble with my model photography recently. Up until now I've been fairly content with my snapshots - taken with my iPhone and some cheap mini lights - but have wanted to improve the quality.
Well, I hoped I had taken some steps to better pictures of my finished models when I received a terrific new camera for Christmas - a superb Canon 700D DSLR - but try as I might my model pictures actually got worse (I think). The camera isn't at fault, it's the learning curve as I step up from fully automatic iPhone photography to the fully manual world of a complex digital single lens reflex camera.
Though, as well as the increase in technical complexity I have also been having a lot of problems getting the right light for close-up photography.
Improving my 'mini studio'
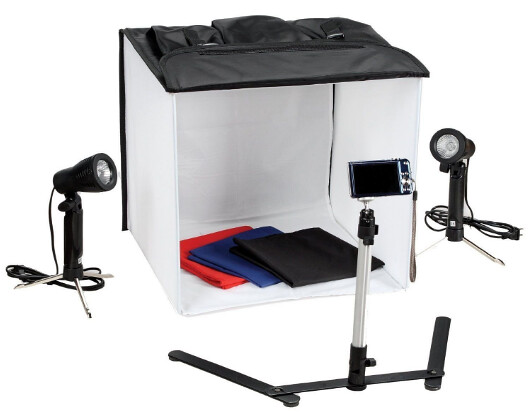
To begin with, I bought myself a relatively cheap 'mini studio' - a small backdrop tent and a couple of continuous lamps. I hoped this would give me the consistent light I needed, and to some extent, it was adequate with the very forgiving focus and exposure of the iPhone camera.
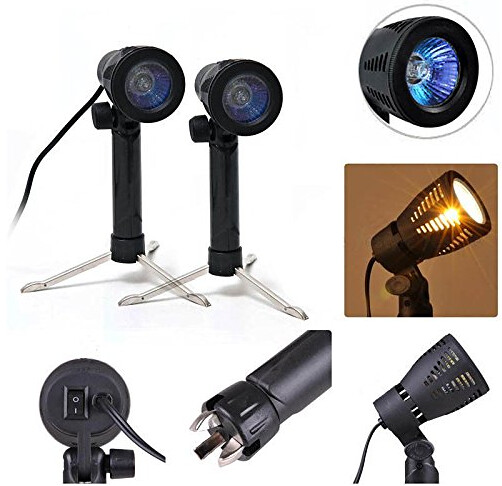
The issue is the lamps. They are cheap little contraptions which run halogen bulbs and this set-up has two major disadvantages - the light levels are not adjustable and the bulbs get very (very) hot!
These lamps also produce a very bright and intense light which is a little too harsh and uncompromising for my little models and their delicate detail. So I had been considering upgrading the lamps to a nice set of dimmable LED panel lights (of a type I use in my video work), but this seems a little over-kill as the one good thing about my cheap halogen lamps are the are so compact and easy to store.
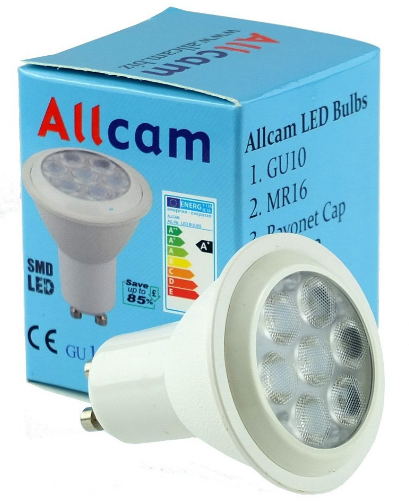
Well, I hit upon a compromise when I discovered that you could buy an LED bulb that fitted the bayonet mounts that my little lamps use. This would solve the heat problem - allowing me to leave the lights on longer - but they still would not be dimmable.
Left: 7W Ultra Bright GU10 LED bulbs of the type that will fit my little mini studio lamps. There are various makes and power outputs. the ones I bought were by Philips and cost £3.50 each.
What I needed was some sort of diffuser or 'soft box' for my LED lamps, to control the intensity of the light given out. I reckoned I could make a little light shade or some sort, with some semi-opaque material over the front to soften the light. (I could not even consider using any form of diffuser material with the mini lamps while they used halogens, not unless I wanted a nice little house fire!)
Making a 'soft box' for my lamps
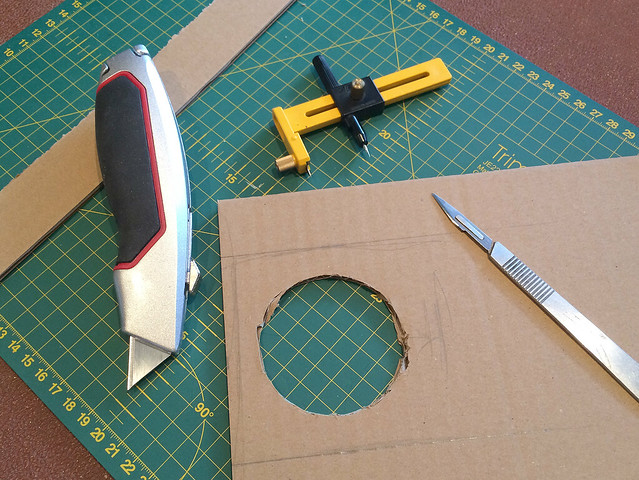
I decided to have a go and make a simple prototype to try out the idea. The simplest material I could think of to knock up a test design for my mini 'soft box' was box cardboard, if that worked I could always look for a better material later - but, for now, I just wanted to see if the idea was feasible.
So, off we go...
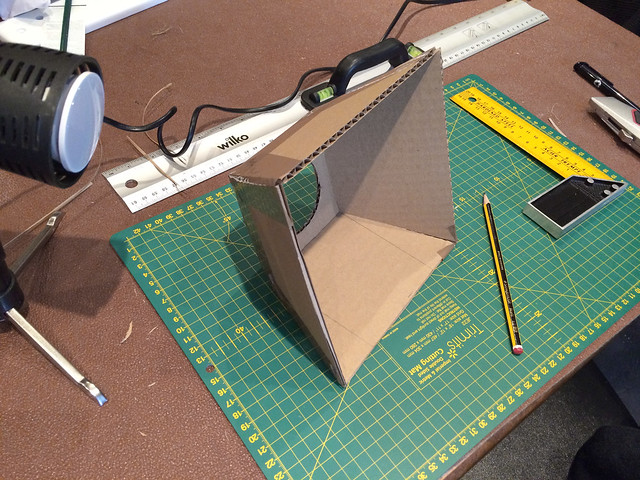
Good start - it fitted snuggly enough - but now the tricky bit, the 'cone'...
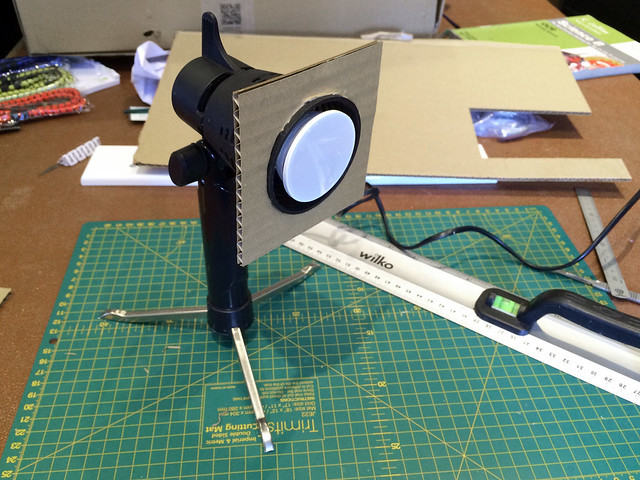
Well, it looks the right shape. But how will it look when I fit it to the lamp?
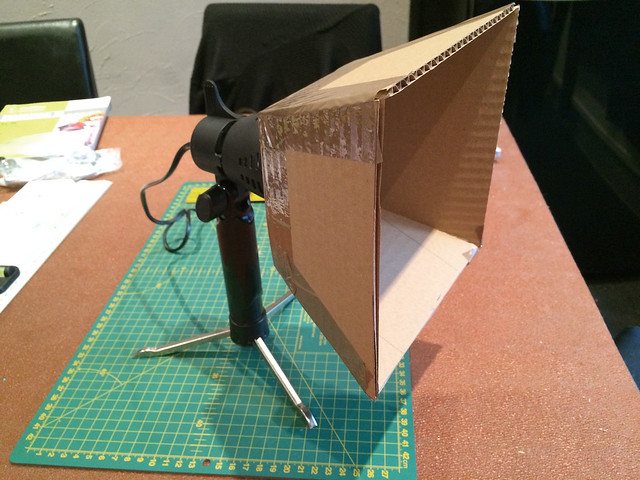
Not bad! Maybe a little big, but I can always modify the size in my next version - presuming this prototype works.
Next: I'll pause here as I now need to find a suitable material to act as the diffuser. Some sort of thin white nylon or maybe even a square of baking paper, maybe? I'll see what I can find in town...
![]() |
| My little 'mini studio', OK to begin with but now I've outgrown it. |
Though, as well as the increase in technical complexity I have also been having a lot of problems getting the right light for close-up photography.
Improving my 'mini studio'
To begin with, I bought myself a relatively cheap 'mini studio' - a small backdrop tent and a couple of continuous lamps. I hoped this would give me the consistent light I needed, and to some extent, it was adequate with the very forgiving focus and exposure of the iPhone camera.
The issue is the lamps. They are cheap little contraptions which run halogen bulbs and this set-up has two major disadvantages - the light levels are not adjustable and the bulbs get very (very) hot!
These lamps also produce a very bright and intense light which is a little too harsh and uncompromising for my little models and their delicate detail. So I had been considering upgrading the lamps to a nice set of dimmable LED panel lights (of a type I use in my video work), but this seems a little over-kill as the one good thing about my cheap halogen lamps are the are so compact and easy to store.
Well, I hit upon a compromise when I discovered that you could buy an LED bulb that fitted the bayonet mounts that my little lamps use. This would solve the heat problem - allowing me to leave the lights on longer - but they still would not be dimmable.
Left: 7W Ultra Bright GU10 LED bulbs of the type that will fit my little mini studio lamps. There are various makes and power outputs. the ones I bought were by Philips and cost £3.50 each.
What I needed was some sort of diffuser or 'soft box' for my LED lamps, to control the intensity of the light given out. I reckoned I could make a little light shade or some sort, with some semi-opaque material over the front to soften the light. (I could not even consider using any form of diffuser material with the mini lamps while they used halogens, not unless I wanted a nice little house fire!)
Making a 'soft box' for my lamps
I decided to have a go and make a simple prototype to try out the idea. The simplest material I could think of to knock up a test design for my mini 'soft box' was box cardboard, if that worked I could always look for a better material later - but, for now, I just wanted to see if the idea was feasible.
So, off we go...
Good start - it fitted snuggly enough - but now the tricky bit, the 'cone'...
Well, it looks the right shape. But how will it look when I fit it to the lamp?
Not bad! Maybe a little big, but I can always modify the size in my next version - presuming this prototype works.
Next: I'll pause here as I now need to find a suitable material to act as the diffuser. Some sort of thin white nylon or maybe even a square of baking paper, maybe? I'll see what I can find in town...
Subscribe to:
Posts (Atom)