 This is my second attempt at a camouflage paint scheme and as my first try went woefully wrong I have tried a few new ways of doing things to – hopefully – get the effect I am after.
Left: My first attempt at a Finnish camo scheme on my Pegasus KV-1e went a little pare shaped!
The main problems had to do with my choice of paints, the way I used the aerosol spray cans and the subsequent over-painting I had to do to rectify the mistake I made when spraying.
Would I do better with this second attempt?
My first big mistake was misjudging both the distance and thickness with which I applied the spray paint. With my KV practice model I sprayed far too close and used a few thicker coats to get the opacity of coat I wanted. So this time I tried to spay at a slightly greater distance – about 45cm away (foot and a half) – and sprayed in much lighter multiple ‘misting’ coats. Between each ‘misting’ I gave a little time for the paint to dry so I could assess how opaque and dark the paint was going to be when dry.
The other mistake I made was mixing different types and makes of paints, I particularly found that the thickness of cheap car spray paints overwhelmed small detail. So this time I bought slightly more expensive specialist modeling sprays by Humbrol and Flames of War.
The Technique
I used the Blu-Tack technique for masking out my separate camo colours, adding a new layer of Blu-Tack – over the basic green coat – for each of the two additional colours. However, something else I changed was that in my first model I followed the convention of laying down the lightest colour first and then adding increasingly darker colours over the top – the end result with my KV tank was a pristine and very dazzling colour effect.

Of course, you can modulate colour brightness by applying a wash, to dull down their ‘newness’, but in my case I decided I wanted to go for a more faded and weathered final effect. To do this I decided to lay down my basic green coat first (probably as it was actually done on the real tank) and then lay down the lighter grey and buff brown on top of the darker base layer.
The act of spraying a light coat of grey over the Russian Green was to, in effect, modulate the grey so it was a tone or two darker, with a slight hint of a green shade to it in places where the coat was especially thin (especially where the mask created a soft edge). I found this effect more realistic and pleasing.
The Results
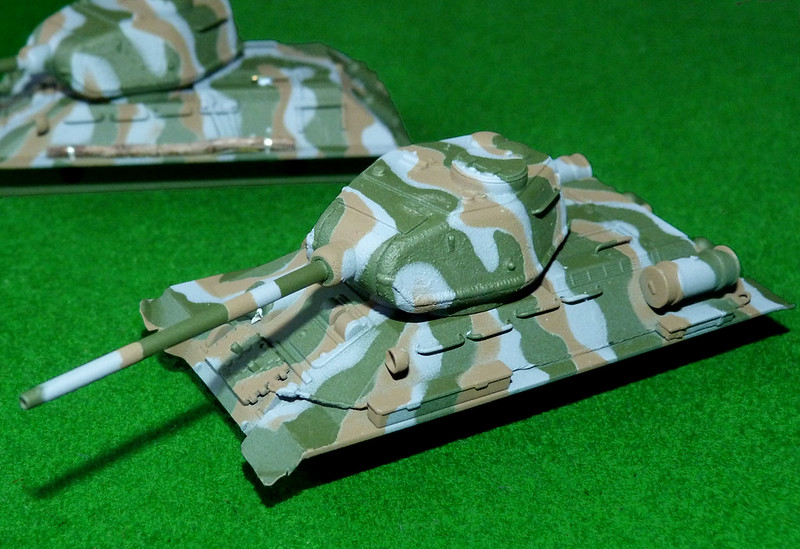
Spraying in several much lighter coats – and allowing them to dry slightly between each application – definitely resolved one of my main criticisms regarding my first attempt at this technique. My KV tank had noticeable ‘bumps’ or lines where one thick coat overlapped another thick coat of paint – the coat on my T-34/85s was smoother and seamless!
Another thing I did was to remove all the Blu-Tack just five minutes after applying the final buff coat – I didn’t not allow the paint to dry overnight as I did with my KV. This may have helped with the seamless effect (I’m not sure).
However, one problem I discovered with the Blu-Tack method that was not apparent on my unmodified KV was that you have to be very careful when removing it if you have added any delicate or fine accessories or modifications. I had added several flimsy foil straps and wires to my T-34/85s and I torn away a couple of these as they had stuck to the Blu-Tack.
Conclusion
Well, of course, I did not repeat the major faux pas that I made with my KV where I accidently over painted a completely different green when I was touching up some of the rough edges of my camo! This one mistake quite ruined a model that was already suffering from my inexperienced painting skills.
This time the whole process went pretty much without a hitch and the end result gave me the smooth and seamless effect I had been after. I guess the moral is – an obvious one – that patience is the key and that it is worth stopping and waiting between lighter spray stages to access the way your effect is developing. Slapping on a couple of thick coats maybe a fast way to opaque layers, but the effect will be gloopy and drown subtle detail.

Finally, if there is one problem with using off the shelf spray cans – over using bespoke mixed paints using a air brush – that is that you often can’t quite find the exact colour that you are after, in my case my buff brown is not quite as red (hazel) as it is supposed to be. But I can explain this away when you take into consideration weathering and fading.
Overall, I’m pleased with my progress with this technique.
No comments:
Post a Comment