Showing posts with label X-Ref: AF/SU122M/0212. Show all posts

Wednesday, 7 March 2018

Skyrex 1/100 SU-122 - Part 3b

My 1/100 WW2 Soviet tank force has been on hold while I awaited the arrival of some additional decals that I ordered. I'm glad to say that they have now popped through my letterbox!


These 1/144 Red Army slogans are the same as the white versions that I used on my 1/100 T-34s...But red (in both senses of the word)!

I'm trying to get both my T-34s and SU-122s to the same point in their painting so that I can do the next couple of stages in their weathering together, hence the wait.

 I wasn't really satisfied with the red number decals that I had applied to this SU-122, I thought the tank looked a little mundane and needed a little something extra. So when I realised you could get the Red Army slogan decals in red I ordered them straight away (though, stupidly, I opted for second class postage which is why they took so long to come).

The decals are by 1/144 Direct in Glasgow. I just have to decide which slogan to add to my SU-122 (just below the numbers)...?

Next: Weathering my T-34s and SU-122s.

Sunday, 1 April 2012

SU-122M conversion - Part 5, The End!

Today I finished my experiment in winter camouflage, my Armourfast SU-85 conversion - the SU122M(3). I'm quite pleased with the weathered chipped effect, it's really fun but you can get a little carried away (as I did). But what the heck, it's a 'what if?' model anyway so who's to say it's not right.


Tuesday, 27 March 2012

SU-122M conversion - Part 4

War gaming base

I have liked the look of the minimalist war gaming bases that I have seen being used for armour. I realise that opinion differs as to whether armour actually needs a base for war gaming - some players prefer to have their vehicles unbased - but I think the little bit of terrain under the vehicle looks attractive. So, as it is another area I need to practise I thought I would have a crack at doing a simple base.

The vehicle I decided to base is my SU-122(3) experiment - which is nearing completion - because this would also give me a chance to experiment with a snowy scene.


The basics
First of all I cut a piece of plasticard to the rough size of the footprint of the tank, allowing a 5mm margin all around. I then masked a little border around the edge of the base as I wanted to paint a narrow dark green edge to my terrain. This is purely optional, as some gamers terrain goes right to the edge of the base, and some don't.

Next I plastered on some Polyfilla to give the rough ground I wanted, mixing in some cheap bird cage grit for texture (£1 for a big bag from Wilkos). Then I lift this to dry out before applying a mid-earth wash based on Tamilya's Flat Earth acrylic - the same colour I used on the tank's tracks.

Then when that was dry I first washed over with a darker and more diluted version of the earth colour so that I got some shadow into the nooks and cranes and then dry brushed a light mix of the Flat Earth over the top.

Above: Here you see just how tight the margin is around the vehicle - the white border
will be painted a dark green to finish it off nicely. Additionally you can see my
nearly complete Mk. II T-34 tank tracks.

Next: The snow!

Tuesday, 13 March 2012

SU-122M conversion - Part 3

Well, another first for me - this time the 'hairspray technique' for doing a winter wash. I wanted a highly weathered and chipped finish, so this startes with a very flakey and faded snow camo layer....


I think the Humbrol spray acrylic is a little thick and 'sticky' for this technique to work absolutely the way it's supposed to, so I will try spraying other types of paint in future attempts (an airbrush - once again! - would help I think).

The tutorial for this technique which I followed can be found here: Mig Jemenez Blog - The Hairspray Technique

NEXT: Pin wash and weathering.

Sunday, 26 February 2012

SU-122M conversion - Part 2

DETAILING AND BASE COATS

So far so good...


I haven't gone crazy with the amount of detailing on this one - I'd still regard this as a quick build. I've just added the side rails, radio mast plug, pistol ports and improved straps around the external tanks. And, of course, there is my Mk. II tracks...


One of the other new things about this model is that I tried out the Flames of War 'War Paint' spray in  Soviet Green. I was a bit worried about it at first as the actual spray is very weak (I thought there was something wrong with the nozzle at first). But the instructions do say that it is best to give a couple of thin coats - even so I ended up giving the model three passes. Still, this didn't bother me in the end as the 'Russian Green' you get is gorgeous.

Here I comare my pristine Flames of War coated SU-122(3) with my weathered SU-85 which was base coated in Humbrol's Dark Green (No. 30) acrylic spray paint...


It's all a matter of taste (and do bear in mind I have yet to weather the SU-122M, which will tone it down) but this is the very green 'Russian Green' I have been after - which is very distinct to either the American Olive Drab or the deep British Bronze Green.

Well, that's it for now on to the pin-washing (no decals on this one) and the weathering of the tracks. On this, you will notice I have base coated the tracks black - this is a tip I got from some tutorial site or other.

NEXT: PIN-WASHING

Friday, 24 February 2012

Simple SU-85 to SU-122M conversion

As I didn’t want to build my two Armourfast SU-85s exactly the same I started looking for some options for a variation. I considered building the later SU-85M version, which would entail some scratch building including making a whole new commander’s cupola based on the T-34/85 commander’s hatch. But really, I wanted something simpler to make.

Luckily I did find a really nice looking variant called the SU-122, an assault gun (which some term a self-propelled gun) that was armed with a 122mm artillery howitzer and was used for infantry support. Interestingly, despite it’s numerical designation, the SU-122 actually came before both the SU-85 and the SU-100 – in around December 1942.


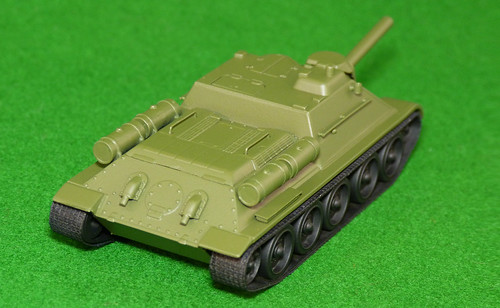
Above: The production SU-122 version. The most distinctive feature - which differentiates it
from the later SU-85 - was the large gun-howitzer mount.

However, as attractive as this idea was, once again it would provided a bit of a challenge for my novice building skills as the 122mm gun was housed in a large gun mantlet that looked quite complicated to scratch build at this point in my modeling career. It is based on the Soviet 122mm field howitzer, which happens to be available – very cheaply – in 1/72 scale from Zvezda (in case you are interested).

Anyroads, it was while I was researching the SU-122 that I came across a prototype variant that caught my interest. The SU-122 proved both popular and very useful in service so it was decided that a modernized version should be created to replace it – this was to be the SU-122M.

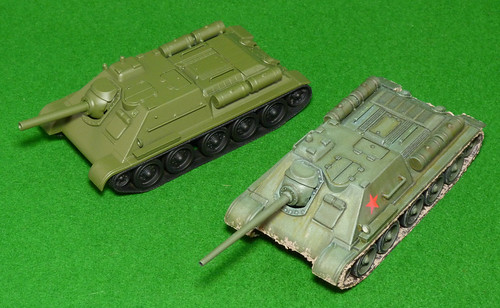
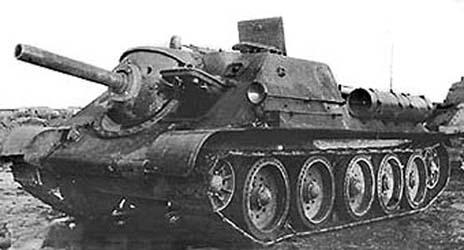
There were two prototype designs and I was interested in the second - the SU-122-3. What's special about the second SU-122M version was that it was the prototype that first incorporated the distinctive ‘ball mount’ mantlet that was later used in the SU-85 tank destroyer!

Above: The second prototype version of the modernised SU-122 - designated the SU-122-3.

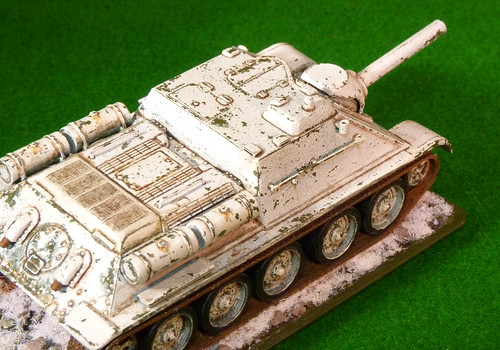
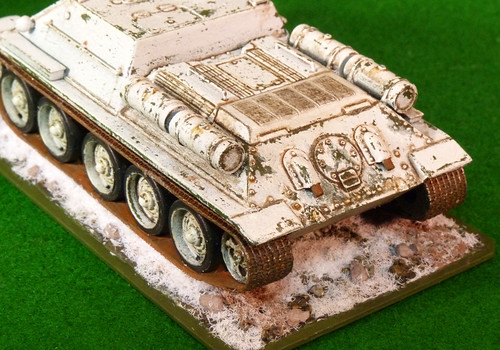
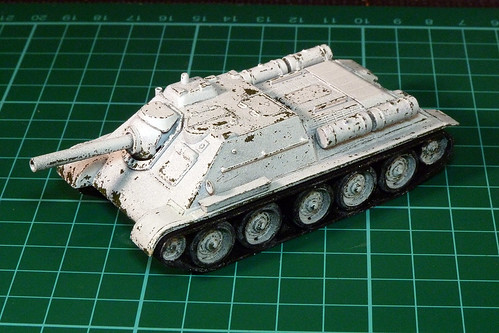
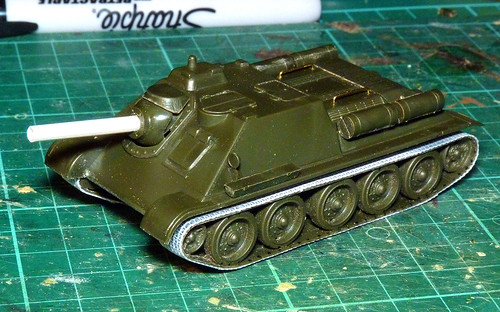
In fact the SU-122M was basically the SU-85 with a larger caliber gun stuck on the front. A REALLY simple conversion job that even I could manage.

There is one small problem though. The SU-122M was only ever a prototype – in the end the Red Army decided to skip this assault gun, due to it’s production costs, keep using the original version and move on to the SU-85 (keeping the specially developed ball mount).

So, although important and interesting, the SU-122M could only be modeled as either a prototype or as a ‘what if?’ element for a war game.

Still, it is an attractive proposition for the war gamer that wants – as I did – something a little different. You can justify it’s use in a game as you could use the technical characteristics of the SU-122 in play, and if your game rules allow ‘what if?’ prototypes in your scenario.

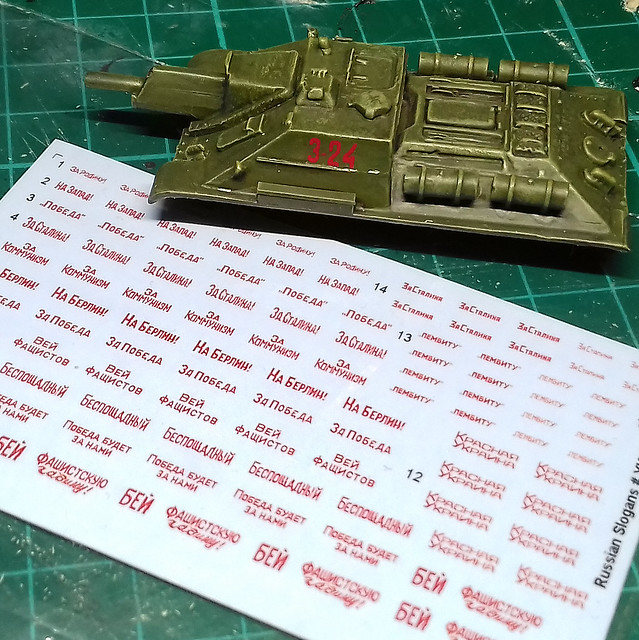
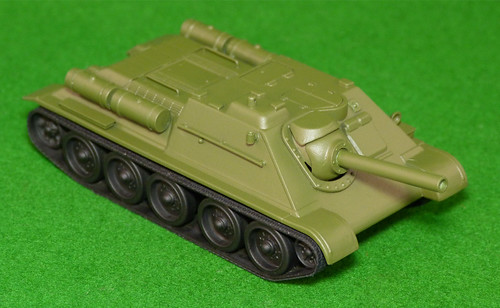
Above: Initial stages of a very simple conversion. I still have some small details to add - but I think this picture shows you just how easy a job this is! Note that I am including my Mk. II track mod.

As for me, I am building it for the fun and because I need a quick platform on which to try out a new painting technique for me – the ‘hairspray technique’.

Hope you find this potted outline of interest. Certainly it’s a quick and dirty way to get a Soviet 122mm SPG onto your gaming table for mid-war scenarios.

(Note: Although the 122mm SU-122 was primarily developed as an assault gun there was a hollow charge developed for it to be used – in an emergency I guess – in the anti-tank role. While the effectiveness of this might be debatable, when compared to specialist AT rounds, I for one wouldn’t have wanted to be in a Panzer IV with one of those foot wide projectiles coming at me! However, you should be aware of this ability if you do decide to put this machine on your game table.)

NEXT: Finished details and basic coat.