Monday, 14 July 2014

1/300 Aircraft - Featured work

As I'm new to this 'micro-scale' modelling stuff I thought it a good idea to look around and see if I can find good examples of what can be achieved in this scale so I have a 'bar' to aspire to. It didn't take me long to find some excellently painted 1/300 aircraft models and to realise that I have a lot to learn about painting in this tiny scale!

Featured 1/300 aircraft 1 - 'Matchstick Fleet' by Phil Warren

Incredibly all these planes have been scratch-build out of carved
matchsticks and painted by Phil.

Phil Warren's work is an extreme example of what's possible, but here's another example that's done using commercially available models...

Featured 1/300 aircraft 2 - 'Fitzkrieg!' by Fitz


Yikes! Well, this is a very high bar indeed with some superb painting - and they are even doing the aircraft markings and identification lettering as well!

I'm not sure I am up to that but we'll see how my LAGG-3 turns out in comparison - oh my poor eyes!

Links to featured work:
> 'Matchstick Fleet' by Phil Warren
> 'Fitzkrieg!' by Fitz

Sunday, 13 July 2014

Scotia Grendel 1/300 LAGG-3 - Part 2

Ok, I couldn't bear it...I just had to tinker!
I decided to correct the wing profile with just a tiny bit of Milliput. I'm not sure how hardy this modification will be for wargaming, Milliput can dry quite hard but having it so thin on trailing edges like this might be asking for a chip if handled roughly. I won't be using my models for gaming though.


Next was the nose profile. As it was it was a bit too P-40 Warhawk looking, so I added some Milliput on the chin to round out the area between the prop boss and the intake.


LAGG-3, Nurmoila, Finland, March 1943. Artist: © Rick Kent.
More Finnish LAGG-3 schemes at Wings Palette.

Finally, I smoothed out the lower body from the intake to the tail to make it more like the version in use by the Finns. I'm not really that familiar with the numerous versions of this plane but the shape of the fuselage between the tail and center intake seems to be one of the things that differentiates them.


Finally, I smoothed out the lower body from the intake to the tail to make it more like the version in use by the Finns. I'm not really that familiar with the numerous versions of this plane but the shape of the fuselage between the tail and center intake seems to be one of the things that differentiates them.

The aircraft became LG-3 in Finnish service, and was assigned to LeLv 32 during
winter 1942/43; this unit was based based at Nurmoila, on the Olonets isthmus.
Source: mig3.sovietwarplanes.com

At this point should say that this model will never be perfect - I am carrying out these small amendments simply to satisfy my own peculiar obsessive nature. For wargaming this 'marker' is quite adequate to represent this type of aircraft - doing this sort of fiddling about will not improve it's ability to act as a 'piece' in a game. (I perhaps should have put this paragraph at the top of the post.)

But in a strange way this sort of fiddling about is what I enjoy most about modelling and why I continually buy cheap wargame models and spend so much time trying to make them look better than they perhaps ought to be. In short, were we talking houses I would be the guy that likes 'fixer uppers'!

Anyway - back to the LAGG-3.

The new 'improved' wing shape - symmetrical and more accurate.

It's the next morning now, I like to give Milliput a whole night to cure properly. This extra time really makes the material quite solid and it sands better in my opinion. I suppose the ideal is that you would have a couple of jobs on the go so you could set one aside to cure while you get on with another (and indeed that is what I did in this case).

The finished profile - a little more like the real aircraft (hopefully).
Now, preparation work done it's time to start the painting process. Again, I am just guessing the best way to do this - I haven't found a 1/300 model tutorial online - so I am going to approach this as I would a larger scale kit and prime it grey to begin with. As this model is white metal this seems to make sense to me.


Now, finally, to the big question. Hand brush or airbrush?

At 1/300 scale I am far more tempted to have - at least on this test model - a go with hand painting the model. An airbrush or aerosol spray seems overkill (unless you were doing a batch of these for a wargame).

As for the paint scheme, well as you have seen with some of the reference photos I've included there is very good historical information on the exact colour schemes to be applied to the Finnish LAGG-3s. In fact, as there were only 3 of these fighters in service with the Finns there is exact schemes for each of these specific aircraft - AND, my favoured example of 'LG-3' (see above photo) there are two specific schemes, one for up to 1944 and one after 1944. SO no problem there!

For more information on these Finnish LAGG-3s go to mig3.sovietwarplanes.com/lagg3/

Next: Painting the LAGG-3.

Oh! PS...The little transparent plastic stand doesn't come with the model. This has to be bought separately. I got mine from Scotia Grendel at the cost of £1.50 for a pack of five.

Friday, 11 July 2014

Scotia Grendel 1/300 LAGG-3 - Part 1

Owing to a really annoying problem with my current project I decided to switch over to one of the little white metal aircraft models that I bought from Scotia Grendel. I am hoping that by the time I finish this mini-project that I might have solved the issues I am having with my larger 1/72 scale model. We'll see.


Anyway, of the half-dozen aircraft I got from Scotia Grendel I decided that the LAGG-3 would have the dubious honour being my very first 1/300 scale victim. The Lavochkin-Gorbunov-Gudkov LaGG-3 was a Soviet design constructed almost entirely from wood-laminate and in 1941 it was considered to be one of the Red Air Force's most advanced fighters. Unfortunately it seems that that didn't mean all that much in the face of opponents like the Me-109 and it proved unpopular with pilots.

My interest in this plane is derived from the fact that Finland operated 3 captured examples of this fighter. Though as far as I was able to determine the captured LAGGs didn't particularly distinguish themselves as I can only find one mention of a 'kill' made by one of them (which is particularly poor considering some of the impressive talleys scored by the tenacious Finns in even older and technically obsolete aircraft).

Source: Wikipedia


The Scotia Grendel model
At 1/300 scale I don't suppose I was expecting much in the way of detail, much less so as the model is made using my nemesis medium - white metal! And - quelle surprise! - this model didn't change any preconceptions I had.

Looking decidedly more P-40 than LAGG-3 I think this plane has been on a diet!

Even though it is small I was still a little disappointed in some of the apparent inaccuracies. For example, one of the most noticeable features is the wing shape, here Scotia Grendel just seem to have got it plain wrong. Though this may, in part, be to do with the amount I ended up filing off the trailing edges in order to make the overall shape of the main wings symmetrical. (So you will have to decide - fatter asymmetrical wing profile, or thinner symmetrical profile!)

As a tabletop wargame marker I think it's quite important that the wing silhouette is as accurate as can be - given that is the most readily identifiable feature of these tiny models as you look at them from above and at a distance.

The top-down profile. Inset is the correct profile, having cleaned up the model's
wings for symmetry they are now too straight and narrow towards the tips.
Source: Wikipedia

There were other tiny gaffs too, which I could list but I'll let the accompanying photos - and the reference pictures - speak for themselves. I don't really want to start out my 1/300 scale enterprise by heaping a load of criticism onto a type of model I have very little experience of - after all, as these are my very first examples of the scale I have no idea if the quality is the 'norm'. (Not for the first time recently I have had to remind myself that a model I am dealing with was made with wargaming - and not display - in mind).

Anyhoo. As I am really using this particular aircraft model as a test model - as I work out strategies for working with the scale - I am prepared to wright this one off to a certain extent. I got to work doing what cleaning up there was with a fine file. There wasn't a lot of flash and the amount of pitting was acceptable and neither destroyed much detail so it doesn't take long to complete.

Here's the original shot I took of the newly arrived 1/300 fighter. As you can
see the LAGG - left - has some flash on the nose and tail and you may be able
to make out the fatter right wing compared to the thinner/straighter left wing.

Next: In the next part I begin the painting of the model.

Thursday, 10 July 2014

New 20mm buildings from Star Fort

Star Fort have just updated their growing range of 20mm MDF lasercut buildings to include a pharmacy and a bakers and hairdressers. These charming little commercial buildings would be ideal for any First or Second World War French town or village set.


An added feature that's being offered is the choice of buying the kits painted (as shown) or unpainted so you can add your own decorative style to these shops. I like this option and think my next purchase will be an unpainted example.

The models can easily be assembled and disassembled again - for storage or ease of transportation - and you can easily access the various floors in order to place your infantry inside them. So these are nice additions to any wargame table and aren't too expensive when you consider their inventive design and sturdy construction.

Boulangerie/Coiffeur - £13.99 unpainted, £16.99 painted.
"The building represents a generic shop front typical of the type found all
over Western Europe. We called it a Boulangerie/Coiffeur, but if you want to
change it to a drogerie, bäckerei or whatever, just let us know when ordering
and we'll print out signs to suit." Star Fort
Pharmicie/Shop - £12.99 unpainted, £15.99 painted.
"The building represents a generic shop front typical of the type found
all over Western Europe. We called it a Pharmicie but if you want to
change it to a boulangerie, boucherie, drogerie, bäckerei or whatever, just
let us know when ordering and we'll print out signs to suit." Star Fort
---------------------------------------------

Link to Star Fort's official web site and online store: www.starfortminiatures.co.uk

Star Fort email: starfortminiatures@gmail.com | Telephone (UK): 078580231362

Wednesday, 9 July 2014

Next Finnish truck - Volvo 'Round Nose' Conversion Part 1

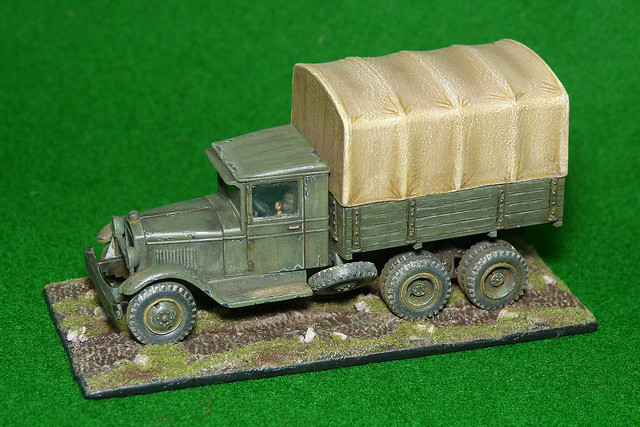
The next truck in my 'Rapid Fire' Finnish Continuation War project will be a quick-build (hopefully). It's going to be a very simple conversion intended to look like a Volvo LV127 'Roundnose'. I've seen a few photos of these trucks being used by the Finns during WW2 and so decided to add another somewhat exotic make (in that it's not readily available as a plastic kit) to to my already eclectic collection of Finnish logistics.

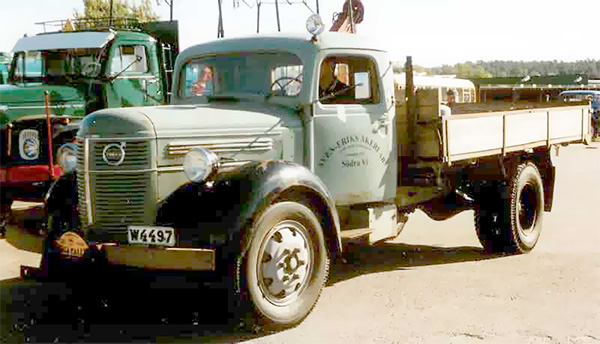
My next task - the Volvo LV-127 'Roundnose', 1943. Source: Wikipedia
The "Roundnose" was introduced in the autumn of 1939, in conjunction with the outbreak of the Second World War. The truck was originally built in three versions. The smallest LV120-series had the same side-valve engine as the Sharpnose. The larger LV125-series and the sturdier LV130-series had the same overhead valve engine as its predecessor LV90.[2] During the war, many of these trucks were equipped with wood gas generators. [Source: Wikipedia]
The term 'Roundnose' was given to this design because of it's beautifully rounded grill and to differentiate it from it's predecessor, the so called 'Sharpnosed' Volvo truck. But you probably figured that one out yourselves!

These Swedish imports were classified as 'medium' class trucks and had 90hp petrol engines - this compared to the 76hp of the Opel Blitz and 95hp of the Ford V3000 V8 (which was probably the most numerous truck available to the Finns). So the Volvos provided the Finns with some much needed motorised muscle.

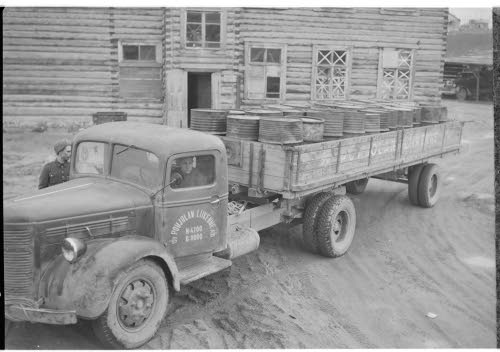
A wartime Finnish army Roundnose, still in it's original civilian commercial
markings. I have been unable to determine how many of these Swedish trucks
were civilian vehicles pressed into service and/or how many were specially
purchased for the Finnish army. Photo source: SA-Kuva

The Conversion job
Ok, potted history over, how will I make my Volvo Round Nose? Well, as simply as I can - I am not trying to make a display quality conversion here, so no refering to authentic blueprints and scratch building. Instead I intend a quick and dirty conversion of another truck kit which bears some superficial resemblance to the Volvo. Simples!

Looking at photos of the Roundnose it immediately struck me that there was a vague similarity to the German Opel Blitz. By sheer co-incidence someone else had already had the same thought as I did. While searching for some reference on the Volvos I came upon this photo of a nearly identical conversion job in the 'Lead Adventure Forum'...

Source: A modeller going by the name of 'Hammers'.
The modeller - who went by the username of 'Hammers' - seems to have come to the same conclusions as I have regarding a donor model and has built a 'round nose' onto an Opel Blitz model. His conversion was, according to the thread description, for a Swedish army vehicle and was in 1/48 scale.

My donor kit will be - in keeping with the quick build theme - a Pegasus 'German Army Truck'. Few parts to muck about with, nice sturdy 'wargaming quality' construction...

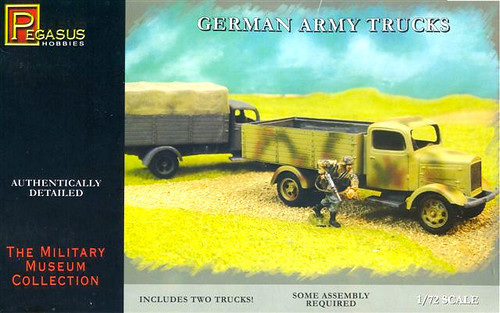
Pegasus 'German Army Truck' - a simplified Opel Blitz type.
Technical note: Pegasus's 'German Army Truck' - What is it? Not important for this project but there is something of a difference of opinion among modellers about just which truck Pegasus's model is supposed to represent. Many suppose it is a simplified Opel Blitz (Opel 3.6-36 S), but other's point out it bears a greater resemblance to the Mercedes L3000A, 3-ton, 4x4 truck.


The Mercedes L3000A 3-ton, 4x4, Cargo. Source: Unkown
The main differences between the Volvo and my chosen donor is - or course - the bonnet and grill of either vehicle. To get my German Army Truck to look like the Volvo I will have to do five things:

1. Detach the current bonnet and grill section from the cab element.
2. Make a new firewall plate that sits between the bonnet and the cab.
3. Remake a new bonnet hood, narrowing it slightly and removing the side vents.
4. Make a new 'Roundnose' grill and fix it n the new bonnet.
5. Reattach new bonnet and grill onto the Pegasus 'German Army Truck' cab.

So, here we go. Let's make a Roundnose!

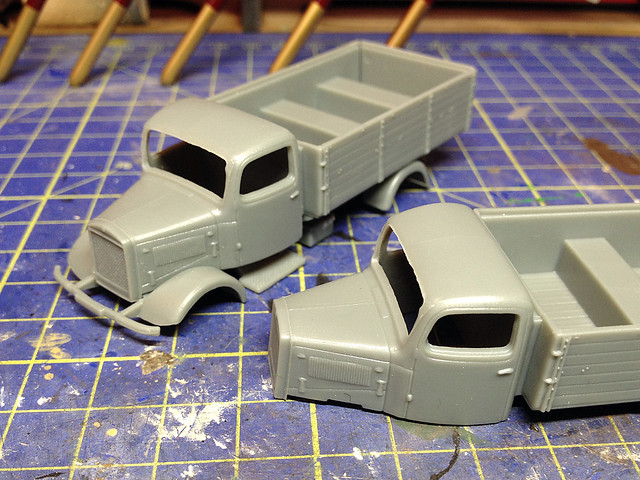
The Pegasus 'German Army Truck' cab and bonnet detail.

Having separated the bonnet from the cab I now have to reconstruct the part of the cab where the bonnet joins it - as this are on the Volvo was flatter - and make a new bonnet that is slightly narrower and straighter than the German truck was. I began with a flat 'firewall' plate between the cab and the engine...

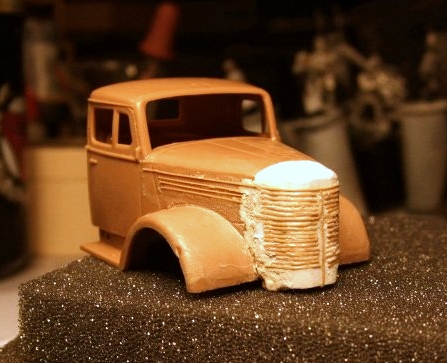
I smoothed off the join between the firewall plate - plasticard - and the cab
and while I was at it I rounded out the windscreen with Milliput to make it
look a bit more Volvo.

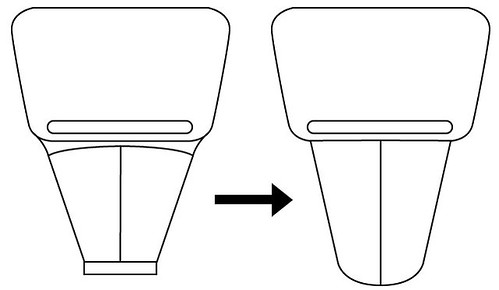
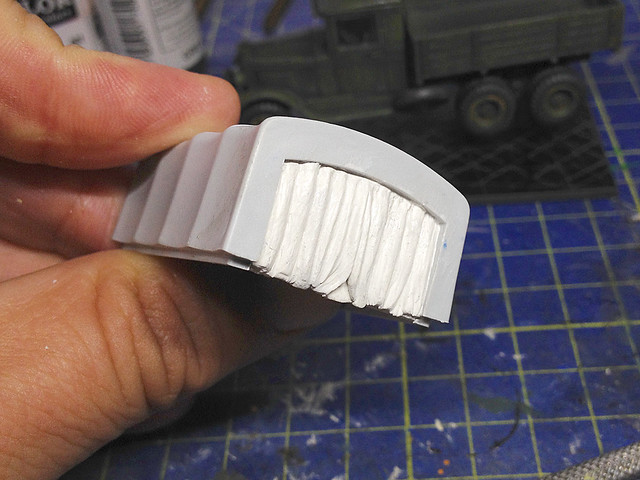
Next, trim the original German truck bonnet down - this isn't exactly the same shape as the Volvo's bonnet but we will fudge this! The German bonnet is more 'V' shaped (if you look at it from above) and comes down to a narrower grill, but to save a time-consuming scratch-build I will be reutilizing the old bonnet with some minor modifications.

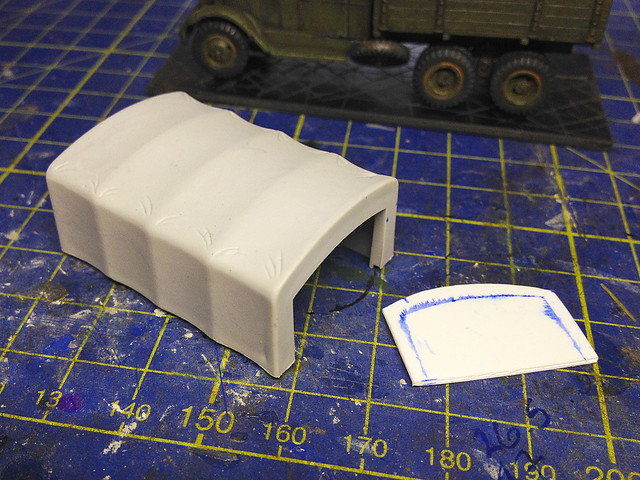
Chopped and smoothed off the old German Truck's bonnet back and front.  The
gap between the cab and the bonnet will be filled and I'll start looking for a
cylindrical item to use to make the 'round nose'.


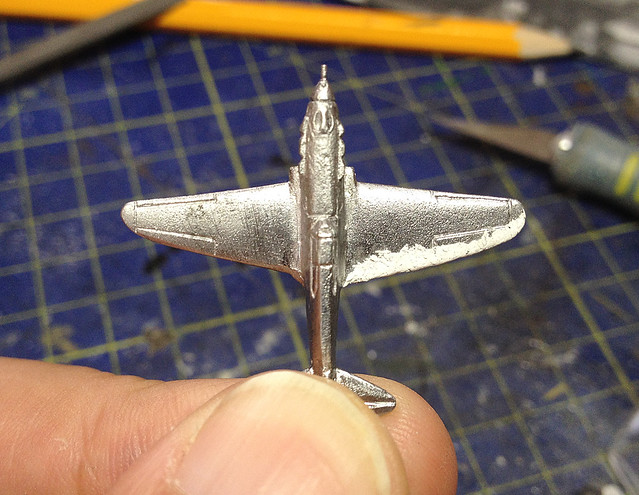
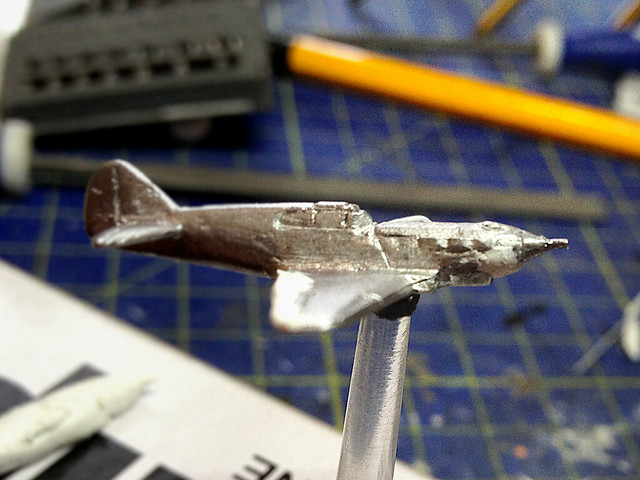
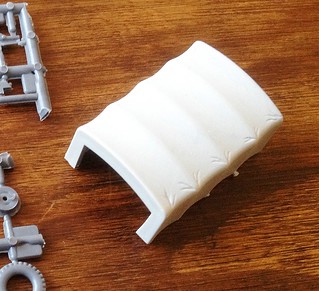
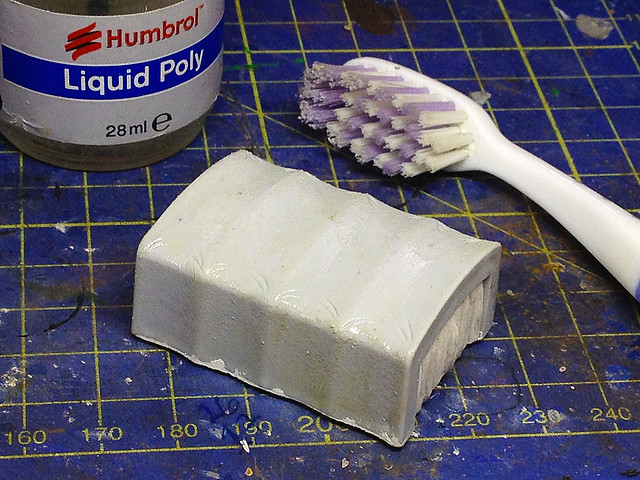
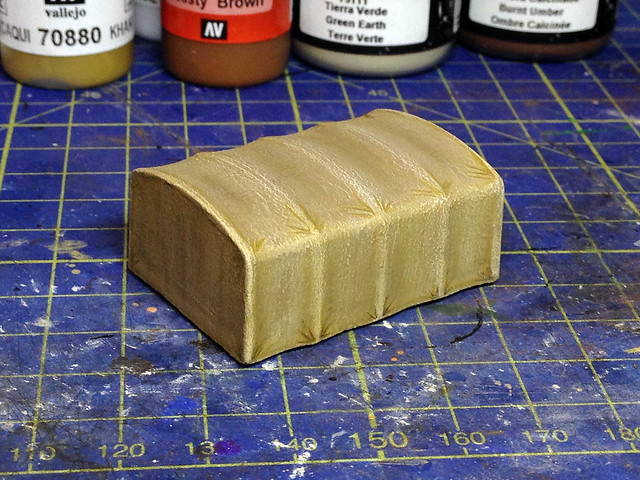
The round nose will be the hardest part of the conversion I guess so I'll take a break here before I begin work on the grill, but you get the idea.

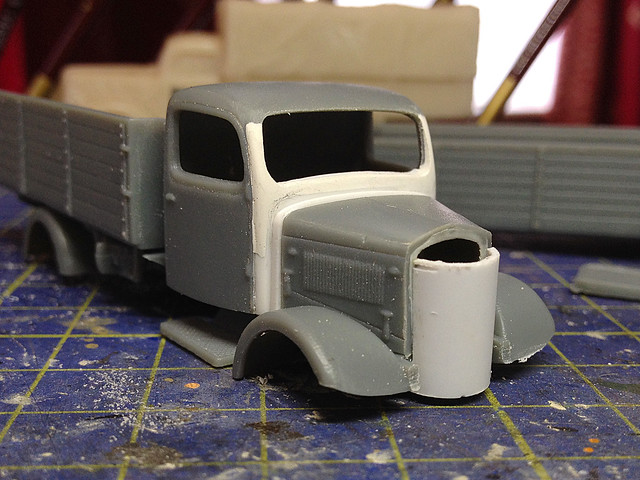
I've temporarily stuck on half-cylinder to get an idea about measurements
for the next stage of the build. There'll need to be more tweaking!

In Part 2: Making the new bonnet and grill.

--------------------

Reference:


Monday, 7 July 2014

PST ZIS-6 Truck - Finished

I'm quite sad to have finished this truck. I was really enjoying this project. Still, always nice to be taking those completion snaps, so without further ado here they are...


Sunday, 6 July 2014

PST ZIS-6 Truck - Tilt canvas mod

PST's very basic tilt canvas
One of the less satisfactory components in PST's ZIS-6 kit - in my opinion - was the tilt canvas cover. It was very basic and not much thought had gone into it's design, leaving the modeller to give it a realistic finish by way of painting.

There was no texture, few details simulating folds in the 'material' and the rear 'door' was just left a gaping hole with no option to place a closed cover on it. So, to finish off the model, I decided to make some improvements.

The main problem was the very smooth plastic PST had used to mould the canvas cover - it didn't look like canvas at all, just a big flat plastic box (with some half-hearted ridges and scores in it to suggest it was a fabric cover). So, problem number 1 - how to simulate a canvas texture?

Here's a nice photo showing a canvas tilt on the back of a ZIS-42M, a relation
of the ZIS-6. You can see a lot more wrinkles and folds in it's canvas
cover than my overly smooth kit version, as well as how it was
actually attached. Source: Wikipedia
There seems to be a couple of ways to add a 'fabric' texture to plastic tilt covers. One way is to use toilet tissue (!) - or similar tissue paper material - soaked in PVA glue to add a thin layer of texture on top of my 'plastic tent'! But this seems a bit messy, so I decided to have a crack at what I think is the easier method - the liquid glue trick.

This technique involves coating a plastic part with a thin layer of liquid poly glue and leaving it for a few seconds - this should be enough to melt the surface just a bit - and then you scrub at the surface with an old toothbrush to scuff it up. The resultant roughened surface

BUT FIRST...I wanted to close the gap at the back of the tilt cover. I did not like the big empty 'hole' this left at the back and so decided to cover this up with a scratch-made drop sheet. So, to begin I made a false partition out of plasticard onto which I could model a sheet with lots of folds in it...


I glued this blanking plate into the 'hole' in the cover. This would give me a firm base onto which I could sculpt my folded material out of good old Miliput putty.


Admittedly I went a bit over the top with lots of vertical folds and it does look more like the Muppet Theatre curtain than a drop cover, but I wanted a dramatic effect. I then test fitted the cover again to ensure the folds tucked nicely inside the wooden flatbed of the truck, which they did.


Next I painted on the poly glue and scrubbed the cover gently with an old toothbrush. The pattern you end up with can be determined by how hard you brush and also in which direction you brush. If you feel that you've gone over the top another light coat of poly glue should smooth the texture back down again. Just keep doing this until you are happy with the result.


The colour of canvas?
Here was another little problem. I couldn't find a reliable or accurate colour photo of a ZIS truck with the original tilt cover in place. Illustrations and other scale models showed a variety of colours, from light green to a canvas brown. Annoying.

The PST box art suggests a buff or light khaki canvas cover colour.

So, I (and you) will have to make some kind of guesstimate at what the correct colour for the cover might be. Looking at the B&W reference photo I included at the top of the page I will hazard a guess that the colour is lighter than the Russian Green of the vehicle itself. The PST box art has an illustration of the truck with a light-khaki canvas cover so I suppose failing any better reference I'll just go with that.


I started with a quick spray of what Humbrol described as 'brown'...OK. And then airbrushed on some highlights to the ridges of the tilt. Then it was back to the workbench and the brushwork begins...


Not the best thing I've done, dry-brushing isn't my favourite technique. But it does look a bit better at a distance! Also, it will be interesting to see how a coat of matt varnish affects the drybrushing effect.

Not much to do now, just some touching up details on the truck itself.